
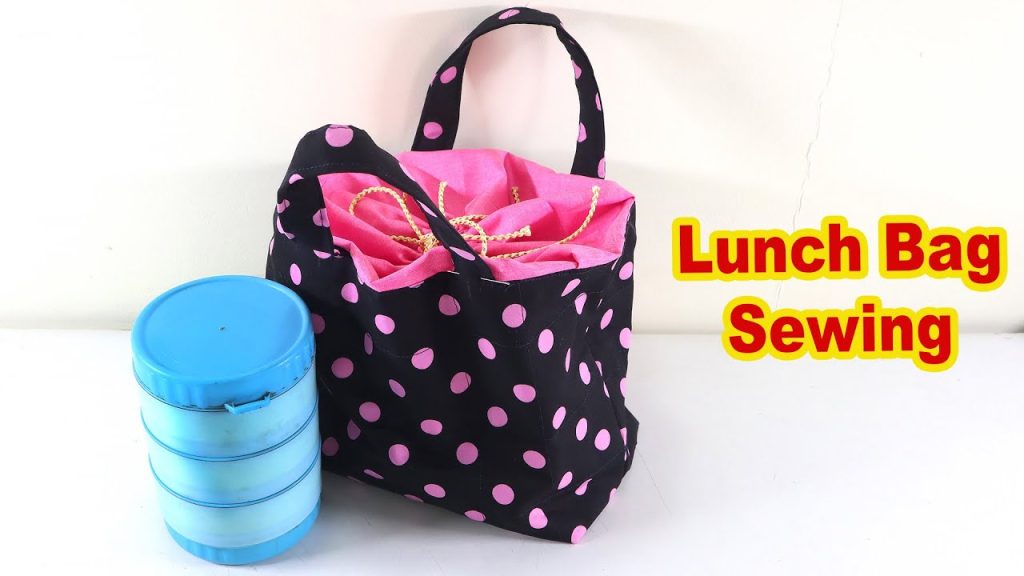
Are you tired of using plastic bags that harm the environment every time you pack your lunch? Making your own cloth lunch bag is easier than you think, and it’s a small change that can make a big difference.
Imagine having a bag that’s not only eco-friendly but also stylish and durable—designed by you, for your needs. In this guide, you’ll discover simple steps to create your very own cloth lunch bag, saving money and helping the planet at the same time.
Ready to get started? Let’s dive in!

Credit: www.youtube.com
Materials Needed
Making a cloth lunch bag is a fun and useful project. You will need some basic materials to get started.
Choosing the right materials helps your lunch bag last longer and look nice.
Choosing The Fabric
Pick a fabric that is strong and easy to clean. Cotton and canvas are good choices. Look for fabric that feels thick and durable.
You can also choose a fun pattern or solid color. This makes your lunch bag unique and personal.
- Cotton fabric (durable and washable)
- Canvas fabric (strong and long-lasting)
- Oilcloth or laminated fabric (water-resistant)
- Fun patterns or plain colors
Essential Tools
You need some tools to cut and sew your fabric. These tools make your work easier and neater.
- Scissors or rotary cutter
- Sewing machine or needle and thread
- Measuring tape or ruler
- Pins or clips to hold fabric
- Iron for pressing seams
Optional Accessories
You can add extra items to make your bag more useful. These accessories add style and function.
- Zippers or Velcro for easy closing
- Handles or straps for carrying
- Inner lining for extra strength
- Decorative patches or embroidery
- Waterproof spray to protect fabric

Credit: www.youtube.com
Preparing The Fabric
Preparing the fabric is the first step to make a cloth lunch bag. You need clean, durable fabric that can hold food items safely.
Good preparation helps you cut the fabric accurately and mark it clearly for sewing.
Measuring And Cutting
Measure the fabric carefully before cutting. Use a ruler or measuring tape for accuracy.
- Decide the size of your lunch bag
- Mark the fabric with chalk or a fabric pen
- Cut the fabric along the marks with sharp fabric scissors
- Cut extra pieces for the lining and straps
Marking The Fabric
Marking shows where to sew and fold the fabric. Use clear, light marks that you can remove later.
| Marking Type | Purpose | Tool to Use |
|---|---|---|
| Cut Lines | Show where to cut fabric pieces | Chalk or fabric pen |
| Sewing Lines | Guide stitching lines | Tailor’s chalk or pencil |
| Fold Lines | Indicate fabric folds | Water-soluble pen |
Sewing The Main Bag
Sewing the main bag is an important part of making a cloth lunch bag. This step gives the bag its shape and strength. You will join pieces of fabric and make sure the bag can hold your lunch items safely.
Follow the instructions below to sew the sides, create the bottom, and add seams that make the bag strong and durable.
Stitching The Sides
Start by placing the two main fabric pieces right sides together. Align the edges carefully. Use a straight stitch to sew along the sides, leaving the top open. This creates the walls of your bag.
Creating The Bottom
To form the bottom, fold the corners of the bag so the side seam and bottom seam meet. Pin the corners flat, then sew across each corner to make a square bottom. This gives the bag depth to hold items.
- Pin the corners at the bottom of the bag.
- Measure about 2 inches from the corner point.
- Sew a straight line across to form the base.
- Trim excess fabric, leaving a small seam allowance.
Adding Seams For Strength
| Seam Type | Purpose | Tip |
|---|---|---|
| Double Stitch | Reinforces edges | Sew twice along the seam line |
| Backstitch | Prevents unraveling | Lock stitches at start and end |
| Topstitch | Adds strength and neat finish | Sew close to the edge |
Use these seam techniques to make sure your lunch bag lasts longer and holds its shape well.
Making The Bag Closure
Closing your cloth lunch bag properly keeps food fresh and safe. A good closure stops spills and keeps the bag neat.
This guide shows ways to make closures for your cloth lunch bag. You will learn how to sew a drawstring channel and other options.
Sewing A Drawstring Channel
A drawstring channel lets you pull the bag tight at the top. Sew a folded strip of fabric near the bag’s opening to make a tunnel for the string.
Make sure the channel is wide enough for the drawstring to slide smoothly. Sew close to the edge but leave enough space inside.
Inserting The Drawstring
Use a safety pin or a bodkin to push the drawstring through the channel. Attach the pin to one end of the string and guide it around the bag’s top.
Once the string is all the way through, pull both ends to close the bag. Tie a knot or bow to keep it shut.
Alternative Closure Options
You can use other closures if you do not want a drawstring. Velcro strips, snaps, or buttons work well to close a cloth lunch bag.
- Velcro is easy to sew and fast to open and close.
- Snaps give a secure closure without bulk.
- Buttons add a decorative touch but may take longer to fasten.
Finishing Touches
After sewing your cloth lunch bag, some final steps will improve its look and function. These finishing touches help your bag last longer and look great.
Focus on adding a liner, decorating the bag, and learning how to wash it correctly. These tips make your lunch bag both useful and stylish.
Adding A Liner
A liner protects the bag from spills and keeps food fresh. You can use waterproof fabric or oilcloth as a liner inside your cloth lunch bag.
- Cut the liner fabric the same size as the bag.
- Sew the liner to the inside edges of the bag.
- Use waterproof or wipe-clean materials for easy cleaning.
- Make sure the liner fits snugly without wrinkles.
Decorating Your Bag
Decorate your lunch bag to make it unique. Use fabric paint, patches, or embroidery to add color and style.
Decoration Ideas:
- Stencil a fun design with fabric paint
- Sew on colorful patches or badges
- Add embroidery with simple patterns
- Attach a small fabric flower or button
Washing And Care Tips
Proper care keeps your cloth lunch bag clean and in good shape. Follow these washing tips to avoid damage.
| Care Step | Instructions |
| Machine Wash | Use cold water on gentle cycle |
| Hand Wash | Use mild soap and warm water |
| Drying | Air dry flat, avoid direct sunlight |
| Ironing | Use low heat if needed, avoid liner area |
Tips For Beginners
Making a cloth lunch bag is simple and fun. It’s a great project for beginners learning to sew.
With a few materials and tools, you can create a unique and reusable lunch bag. Follow these tips to get started.
Common Mistakes To Avoid
Beginners often make some common mistakes. Being aware of these can help you create a better lunch bag.
- Not measuring fabric accurately can lead to uneven bags.
- Using the wrong needle can cause fabric damage.
- Skipping the ironing step can affect the bag’s shape.
Time-saving Tricks
Save time by organizing your workspace. Have all materials ready before starting.
Consider pre-cutting fabric pieces for multiple bags. This way, you spend less time on each individual bag.
Customizing Your Design
Customize your lunch bag to reflect your style. Choose fabrics and patterns you love.
| Material | Design Idea |
| Cotton | Floral prints for a classic look |
| Linen | Minimalist designs for a modern feel |
| Canvas | Bold colors for a vibrant bag |

Credit: www.youtube.com
Frequently Asked Questions
What Materials Do I Need To Make A Cloth Lunch Bag?
You need fabric (cotton or canvas), thread, scissors, sewing machine, and optional lining. Choose durable, washable materials for longevity and easy cleaning.
How Long Does It Take To Sew A Cloth Lunch Bag?
It typically takes 1 to 2 hours for beginners. Experienced sewers may finish faster with simple patterns and stitching.
Can I Customize The Size Of My Cloth Lunch Bag?
Yes, you can adjust the pattern dimensions easily. Tailor the size to fit your lunch containers or personal preferences.
Is A Cloth Lunch Bag Environmentally Friendly?
Absolutely. Reusable cloth bags reduce plastic waste and are biodegradable. They promote sustainable living and eco-friendly habits.
Conclusion
Making a cloth lunch bag is simple and fun. You save money and help the environment. Plus, you create a bag that fits your style. Using basic materials and easy steps makes it doable for anyone. Try it today and enjoy carrying your lunch in a unique, reusable bag.
Small changes like this make a big difference. Start sewing and see how satisfying it feels. Your lunch will look great, and you will feel proud.


