
Have you ever run out of lunch bags and wished you could just make one yourself? What if you could create a simple, eco-friendly lunch bag using just paper?
Imagine saving money, reducing waste, and adding a personal touch to your lunch every day. You’ll learn exactly how to make a sturdy paper lunch bag that’s perfect for your meals. It’s easier than you think, and once you try it, you’ll never look at lunch bags the same way again.
Keep reading, and discover a quick, fun way to carry your lunch with style and care.
Materials Needed
Making a lunch bag from paper is simple and fun. You only need a few basic materials.
This guide covers the types of paper to use and extra supplies required.
Types Of Paper To Use
Choose paper that is strong and easy to fold. Kraft paper and construction paper work well.
- Kraft paper: Durable and natural brown color
- Construction paper: Comes in many colors
- Cardstock: Thick and sturdy for extra support
- Recycled paper: Eco-friendly and cost-effective
Additional Supplies
You need some extra items to make and decorate the lunch bag.
| Supply | Purpose |
|---|---|
| Glue or tape | To hold paper pieces together |
| Scissors | To cut paper to the right size |
| Markers or crayons | To decorate the bag |
| Ruler | To measure and fold paper neatly |
| String or ribbon | To make handles |

Credit: www.youtube.com
Preparing The Paper
Making a lunch bag from paper starts with preparing the right paper. This step helps create a strong and useful bag.
Careful preparation makes sure the paper will hold food safely and last through the day.
Cutting To Size
Cut the paper to the size you need for the bag. It should be big enough to hold your lunch.
Use a ruler and scissors or a paper cutter. Straight edges make folding easier.
- Measure the width and height of your lunch items
- Add extra space for folding and closing the bag
- Cut clean, straight lines for better results
Reinforcing The Paper
Paper can tear easily. Reinforce it to make the lunch bag stronger and last longer.
Add extra layers or use tape on edges and corners to keep the bag safe and secure.
- Glue a second sheet inside the main paper for strength
- Use clear tape on all edges and corners
- Focus on the bottom and opening where stress is highest
Folding Techniques
Making a lunch bag out of paper uses simple folding techniques. These folds create a strong shape that holds food well.
Follow these steps to fold the paper correctly and make your lunch bag sturdy and neat.
Creating The Base
Start by folding the bottom of the paper to form a flat base. This base supports the weight of the lunch items.
- Lay the paper flat on a table.
- Fold up about 2 inches from the bottom edge.
- Press the fold to create a sharp crease.
- Open the fold and fold the two bottom corners inward.
- Refold the bottom edge up to form a rectangle.
Forming The Sides
Next, fold the sides to give the bag depth. This step turns the flat paper into a three-dimensional shape.
| Fold | Description |
|---|---|
| Side Fold | Fold each side 1.5 inches toward the center. |
| Crease | Press the folds firmly for support. |
| Expand | Pull the sides out to open the bag shape. |
Shaping The Top
The top folds finish the bag and allow it to close neatly. These folds also add style to your lunch bag.
- Fold the top edges inward about 1 inch on both sides.
- Fold the top edge down to meet the sides.
- Press to create a crisp fold.
- Optionally, fold the corners inside for a cleaner look.
- Use tape or a clip to hold the top closed if needed.
Securing The Bag
After folding and shaping your paper lunch bag, it is important to secure it well. This keeps the bag strong and holds your lunch safely inside.
You can use simple tools like glue or tape to seal the edges. Adding handles makes it easier to carry the bag.
Using Glue Or Tape
Glue or tape helps keep the paper edges together. Use clear tape for a neat look or glue for a cleaner finish without sticky edges.
Apply glue or tape on the inside edges where the paper folds meet. Press firmly to make sure it sticks well.
- Use a glue stick or white craft glue for easy application
- Clear tape works best on thicker paper
- Seal all open edges to prevent the bag from opening
- Allow glue to dry before using the bag
Adding Handles
Handles make your lunch bag easier to carry. You can use paper strips, string, or ribbon for handles.
Attach the handles by taping or gluing them to the inside top edges of the bag. Make sure they are secure and can hold weight.
- Cut two strips of paper or use string about 6-8 inches long
- Glue or tape each end of the strip inside the bag
- Press firmly and let dry before carrying
- Test the handles gently to check strength
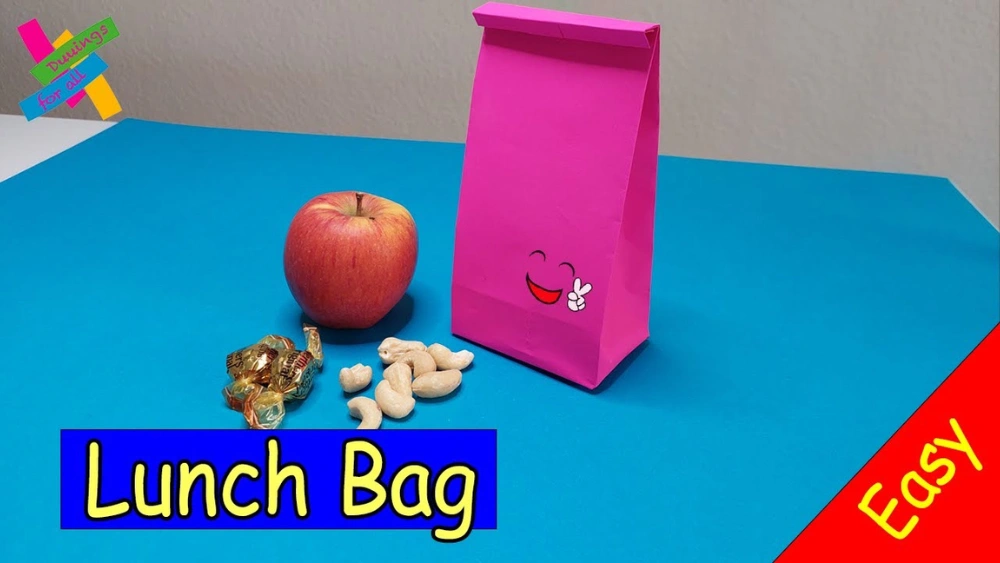
Decorating Ideas
Making a lunch bag from paper is fun and easy. Decorating it makes it special and unique.
You can use many simple ways to decorate your paper lunch bag. This guide shows you some fun ideas.
Painting And Drawing
Painting and drawing let you add color and style to your bag. Use markers, crayons, or paints to make designs.
Try drawing shapes, patterns, or your favorite characters. Let the paint dry before using the bag.
- Use bright colors for a cheerful look
- Draw simple shapes like stars or hearts
- Write your name or a fun message
- Try mixing colors for a new effect
Adding Stickers And Labels
Stickers add quick and easy decoration. Choose fun shapes or themes that you like best.
Labels can help organize your lunch bag. Write your name or the date on a label for neatness.
- Pick waterproof stickers to avoid damage
- Use colorful labels for a bright touch
- Place stickers where they stand out
- Combine stickers and labels for a cool look
Tips For Durability
Making a lunch bag out of paper is fun and eco-friendly. It’s important to ensure that it lasts. Here are some tips for making your paper lunch bag more durable.
Waterproofing Methods
Waterproofing helps keep the bag dry and strong. There are simple methods to make your paper bag resistant to water.
- Use wax paper to line the inside of the bag.
- Apply a thin layer of beeswax for extra protection.
- Consider using a waterproof spray for paper products.
Reinforcing Weak Spots
Reinforcing the bag’s weak spots can prevent tears. Focus on the bottom and corners of the bag.
To make your lunch bag more robust, try these ideas:
| Area | Reinforcement Method |
| Bottom | Add a cardboard base |
| Corners | Use extra tape or glue |
| Handles | Double-layer paper strips |
Eco-friendly Alternatives
Making a lunch bag out of paper is a simple and eco-friendly choice. You reduce waste and help the planet with each use.
Let’s explore some options for creating a sustainable lunch bag using recycled materials and biodegradable coatings.
Recycled Paper Options
Recycled paper is a great choice for making lunch bags. It uses less energy and water than new paper.
- Look for paper labeled as 100% recycled.
- Choose paper with post-consumer content.
- Avoid bleached or heavily dyed paper.
Biodegradable Coatings
Biodegradable coatings make the paper lunch bag more durable. They help protect against moisture and grease.
| Coating Type | Benefits |
| Wax-Based | Natural and eco-friendly |
| PLA (Polylactic Acid) | Compostable and strong |
| Starch-Based | Biodegradable and safe |

Credit: www.youtube.com
Troubleshooting Common Issues
Making a lunch bag out of paper is easy but can come with some problems. Tears and weak structure are common issues. Fixing these helps your bag last longer and hold items safely.
This guide covers tips on preventing tears and improving the stability of your paper lunch bag. Follow these simple ideas to avoid common mistakes.
Preventing Tears
Tears often happen where the paper folds or holds weight. Using strong paper and careful folding helps stop this problem.
- Choose thick paper or cardstock for durability.
- Fold edges sharply with a bone folder or ruler.
- Reinforce corners with tape or extra paper strips.
- Avoid overloading the bag with heavy items.
- Keep the bag dry to prevent weakening of the paper.
Improving Stability
A stable lunch bag keeps food safe and prevents spills. The base and sides must support the weight evenly.
| Issue | Cause | Fix |
| Bag collapses | Weak base or no support | Add a cardboard piece inside the base |
| Sides fold in | Loose folds or thin paper | Double fold sides and use stronger paper |
| Handles tear off | Handles not well attached | Glue and tape handles securely |

Credit: www.youtube.com
Frequently Asked Questions
How Do I Make A Simple Paper Lunch Bag?
To make a simple paper lunch bag, fold a large paper sheet into a rectangle. Secure edges with tape or glue. Add a folded bottom to hold items. Decorate as desired for personalization.
What Type Of Paper Is Best For Lunch Bags?
Kraft paper or thick construction paper works best. They are sturdy, eco-friendly, and food-safe. Avoid thin paper to prevent tearing and spills.
Can I Make A Waterproof Paper Lunch Bag?
Yes, by applying a thin layer of wax or using a waterproof spray. This helps resist moisture and keeps food fresh longer. Ensure the coating is food-safe.
How Do I Decorate A Homemade Paper Lunch Bag?
Use markers, stickers, stamps, or washi tape. Personalize with names or drawings. Avoid toxic paints or materials that can transfer to food.
Conclusion
Making a lunch bag from paper is simple and fun. You only need a few materials and some patience. This project saves money and helps reduce plastic use. You can decorate the bag to make it unique. Try making different sizes for various meals.
Practice a few times to get better results. Using paper bags is a great way to be eco-friendly. Start crafting today and enjoy your homemade lunch bag every day. Small steps like this can make a big difference.


