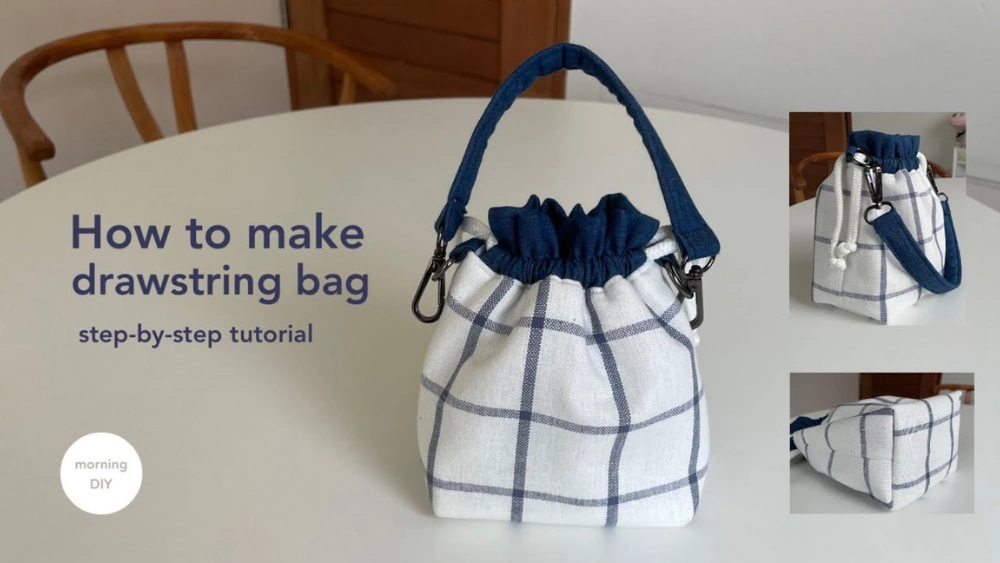
Are you looking for a simple and fun project that you can finish in no time? Making a mini drawstring bag is easier than you think, and it’s a great way to add a personal touch to your accessories.
Whether you want to organize small items, create a cute gift bag, or just try something new, this guide will walk you through every step. By the end, you’ll have your own stylish mini drawstring bag ready to use or share.
Let’s get started and make something special together!

Credit: www.youtube.com
Materials Needed
Making a mini drawstring bag is simple and fun. You need some materials to start. These materials help you create a sturdy and pretty bag.
This guide covers fabric choices, tools, and decorations to make your bag unique.
Fabric Choices
Choose fabric that is strong and easy to sew. Cotton and linen are good for beginners. Felt and canvas make a sturdier bag. Avoid slippery fabrics like silk.
- Lightweight cotton
- Linen fabric
- Felt sheets
- Canvas material
- Quilting fabric
Required Tools
You need a few tools to cut and sew the fabric. A sewing machine helps but hand sewing works too. Use pins to hold fabric pieces together. Sharp scissors cut clean lines.
| Tool | Purpose |
|---|---|
| Sewing machine | Stitch fabric quickly |
| Scissors | Cut fabric pieces |
| Pins | Hold fabric before sewing |
| Measuring tape | Measure fabric size |
| Needle and thread | Hand sewing and finishing |
Optional Decorations
Decorate your bag to make it special. Use buttons, ribbons, or patches. You can also add fabric paint or embroidery for a personal touch.
- Buttons in different shapes
- Colorful ribbons
- Iron-on patches
- Fabric paint
- Embroidery thread
Preparing The Fabric
Preparing fabric correctly is key to making a neat mini drawstring bag. This step helps you cut the fabric pieces to the right size.
Careful preparation saves time during sewing and improves the bag’s look and durability.
Measuring And Cutting
Use a ruler or measuring tape to get accurate fabric dimensions. Mark the fabric with a fabric pencil or chalk for clear lines.
- Measure twice before cutting to avoid mistakes.
- Cut on a flat surface to keep fabric steady.
- Use sharp fabric scissors for clean edges.
- Cut both main fabric and lining if your bag has one.
- Keep all pieces flat and smooth to avoid distortion.
Marking Seam Allowances
Seam allowances are the extra space around the edges for sewing. Mark these clearly to know where to stitch.
| Seam Type | Standard Allowance | Notes |
|---|---|---|
| Side seams | 1/4 inch (0.6 cm) | Use a consistent width for all sides |
| Top edge | 1/2 inch (1.3 cm) | Allows room for the drawstring casing |
| Bottom edge | 1/4 inch (0.6 cm) | Keep flat for a neat finish |
Sewing The Bag Body
Sewing the body of your mini drawstring bag is simple and fun. You will join the fabric pieces to make the shape of the bag. Careful stitching makes the bag strong and neat.
Follow the instructions below to sew the sides and create the bottom of the bag. Use a sewing machine or sew by hand with even stitches.
Stitching The Sides
First, place the two fabric pieces right sides together. Match the edges carefully. Pin the sides to keep the fabric in place. Sew a straight seam along the sides, about half an inch from the edge. Leave the top open for the drawstring casing.
- Align fabric pieces with right sides facing each other
- Pin the sides to prevent shifting
- Sew straight seams about 1/2 inch from the edge
- Backstitch at the start and end for strength
- Leave the top edge open
Creating The Bottom
To form the bottom, you will sew the corners flat. This gives the bag a box shape. Fold each bottom corner so the side seam and bottom seam line up. Pin the corner in place. Sew across the corner about one inch from the tip. Trim the excess fabric to reduce bulk.
| Step | Action |
| 1 | Fold bottom corner with seams aligned |
| 2 | Pin the corner flat |
| 3 | Sew straight across about 1 inch from corner tip |
| 4 | Trim excess fabric close to the seam |
| 5 | Repeat for the other corner |
Making The Drawstring Channel
The drawstring channel is the top part of the bag where the string goes through. It helps the bag close and open easily. Making this part well is very important.
In this guide, you will learn how to fold the top edge and sew the casing. These steps create a neat channel for the drawstring.
Folding The Top Edge
First, fold the top edge of your fabric down. This fold forms the base of the drawstring channel. Make sure the fold is wide enough for your drawstring to fit through.
Use an iron to press the fold flat. Pressing helps keep the fold in place while you sew. A neat fold makes the bag look tidy and professional.
- Fold fabric edge down about 1 inch (2.5 cm)
- Press fold with a hot iron
- Ensure fold is straight and even
Sewing The Casing
Next, sew along the bottom edge of the fold. This creates the casing or channel for the drawstring. Leave both ends open so you can pull the string through later.
Use a straight stitch and sew close to the folded edge. Sew slowly to keep the line straight. A well-sewn casing lets the drawstring move smoothly.
- Set sewing machine to straight stitch
- Sew about 1/4 inch (0.6 cm) from the folded edge
- Leave ends open for the drawstring
- Backstitch at start and end for strength
Adding The Drawstring
Adding a drawstring to your mini bag is a simple and fun task. It helps the bag close securely and adds a decorative touch.
Choose the right cord and use the correct technique to make threading easy and effective.
Choosing The Cord
The cord you choose affects both the look and function of your bag. Consider the material and thickness.
- Choose a soft material like cotton for comfort.
- Use a thicker cord for durability.
- Match the color of the cord with your bag for style.
Threading Techniques
Threading the cord properly ensures the bag closes neatly. You can use different methods based on your preference.
| Technique | Difficulty | Tools Needed |
| Simple Loop | Easy | None |
| Needle Threading | Moderate | Large-eye needle |
| Bodkin Method | Easy | Bodkin |
Finishing Touches
Finishing touches make your mini drawstring bag look neat and complete. These small details add strength and style.
Focus on securing the ends and adding embellishments to give your bag a polished look.
Securing The Ends
Secure the ends of your drawstrings to stop them from fraying or slipping out. You can use simple knots or heat sealing.
Tie a tight knot at each end or use a lighter to gently melt synthetic cords. This keeps the ends neat and safe.
- Tie a double knot to stop unraveling
- Use clear nail polish on natural fibers
- Melt synthetic ends carefully with a lighter
- Attach small beads to knots for weight
Adding Embellishments
Add decorations to make your mini drawstring bag unique. Embellishments can be sewn, glued, or tied on.
Try buttons, patches, or small charms to match your style. Keep them light so the bag stays easy to carry.
- Sew on small fabric patches or appliques
- Glue on sequins or small beads carefully
- Attach charms to drawstring ends
- Use fabric paint for custom designs
Styling Ideas
Making a mini drawstring bag is fun and lets you add your style. You can change colors, patterns, and decorations to make it unique.
This small bag works well for many uses. Learn how to personalize it and use it as a gift or for storage.
Personalizing Your Bag
Adding personal touches makes your mini drawstring bag special. Use fabric paint, patches, or embroidery to decorate it. You can also attach beads or buttons to the strings.
- Use fabric markers to draw designs
- Sew on patches or fabric shapes
- Add lace or ribbon around the edge
- Attach small charms to the drawstrings
- Use contrasting thread for visible stitches
Gift And Storage Uses
Mini drawstring bags make great gifts and help organize small items. You can use them to hold jewelry, coins, or party favors.
| Use | Ideal Items | Notes |
| Gift bag | Small presents, candies, jewelry | Add a gift tag or bow |
| Storage | Coins, keys, earbuds | Keep items tidy in a drawer |
| Travel pouch | Travel-size toiletries, chargers | Easy to pack and carry |

Credit: www.youtube.com
Troubleshooting Tips
Making a mini drawstring bag can be easy, but issues can arise. Here are some troubleshooting tips to help you.
Address common sewing mistakes and drawstring problems with these solutions.
Common Sewing Mistakes
Sewing mistakes can affect the final look of your mini drawstring bag. It’s important to catch these errors early.
- Check if your stitches are even and tight.
- Ensure fabric edges are aligned before sewing.
- Verify that you are using the correct needle for the fabric type.
Fixing Drawstring Issues
Problems with the drawstring can make your bag hard to use. Follow these tips to fix them quickly.
If the drawstring is too tight, try loosening the knot. If it doesn’t move smoothly, check the fabric tunnel for snags or twists.
| Issue | Solution |
| Drawstring too short | Replace with a longer cord |
| Knot slips | Use a double knot |
| Fraying ends | Seal with fabric glue |

Credit: www.youtube.com
Frequently Asked Questions
What Materials Are Needed For A Mini Drawstring Bag?
To make a mini drawstring bag, you need fabric, a drawstring cord, scissors, pins, and a sewing machine or needle. Cotton or canvas fabric works best. Choose a matching thread color and optionally add decorative elements for a personalized touch.
How Do You Sew A Mini Drawstring Bag?
Cut two fabric rectangles, sew three sides, and leave the top open. Fold and sew the top edge to create a casing. Thread the drawstring cord through the casing using a safety pin. Pull the cords to close the bag securely.
Can Beginners Easily Make A Mini Drawstring Bag?
Yes, beginners can make a mini drawstring bag. It requires basic sewing skills and simple steps. The project is quick and perfect for practicing straight stitches and casing creation. Follow a clear tutorial for the best results.
How Long Does It Take To Make A Mini Drawstring Bag?
Making a mini drawstring bag usually takes 30 to 60 minutes. Time depends on skill level and design complexity. Beginners might take longer, while experienced sewers can finish quickly.
Conclusion
Making a mini drawstring bag is simple and fun. You only need a few materials and steps. This project helps you create a useful and pretty item. You can use it for small things or gifts. Practice will improve your sewing skills over time.
Try different fabrics and colors for variety. Enjoy crafting something with your own hands. Keep this guide handy for your next bag. Happy sewing!