

Looking for a stylish and practical accessory you can make yourself? A mini messenger bag is the perfect project.
It’s small, handy, and adds a personal touch to your outfit. Imagine carrying your essentials in a bag you crafted with your own hands. In this guide, you’ll discover simple steps to create a mini messenger bag that fits your style and needs.
Ready to turn fabric and creativity into something useful and unique? Let’s get started!
Materials Needed
Making a mini messenger bag is a fun project. You need the right materials to get started.
Below are the main materials to prepare before sewing your bag.
Fabric Choices
Choose fabric that is strong but light. This helps the bag hold its shape and last long.
- Cotton canvas – durable and easy to sew
- Denim – sturdy and casual
- Leather or faux leather – stylish and long-lasting
- Waxed canvas – water-resistant and tough
- Lining fabric – cotton or polyester for inside
Pick fabric that matches the bag’s use and look you want.
Tools Required
You need some basic tools to cut and sew the fabric. These make the process smooth and safe.
- Fabric scissors or rotary cutter
- Measuring tape or ruler
- Pins or clips to hold fabric pieces
- Needles for hand sewing or a sewing machine
- Seam ripper to fix mistakes
- Iron and ironing board
Have these tools ready before you start cutting the fabric.
Additional Supplies
Extra supplies help add function and style to your messenger bag.
- Zippers or magnetic snaps for closures
- Strap material like webbing or leather
- Thread that matches or contrasts with fabric
- Interfacing for bag structure and support
- Decorative buttons or patches (optional)
- Fabric glue or tape for no-sew areas
Make sure to gather all supplies before starting your project.

Credit: www.youtube.com
Preparing The Fabric
Preparing the fabric is an important step before making a mini messenger bag. It helps ensure your bag looks neat and lasts long.
This section covers how to measure, cut, and mark your fabric properly for the project.
Measuring And Cutting
Measure your fabric carefully to match the bag’s pattern pieces. Use a ruler or measuring tape for accuracy.
- Lay the fabric flat on a clean surface.
- Use a fabric marker or chalk to mark the measurements.
- Cut along the marked lines with sharp fabric scissors.
- Double-check the pieces to make sure they match the pattern size.
Marking The Pattern
Marking the pattern on the fabric helps you sew the bag parts in the right place. Use a fabric chalk or pencil for this task.
| Tool | Use | Tip |
|---|---|---|
| Fabric Chalk | Mark sewing lines and shapes | Choose a light color on dark fabric |
| Fabric Pencil | Draw detailed pattern lines | Test on scrap fabric first |
| Ruler or Measuring Tape | Measure exact distances | Keep steady for straight lines |
| Pattern Weights | Hold pattern in place while marking | Use heavy objects or pins carefully |
Sewing The Bag Body
Sewing the body of a mini messenger bag is a key part of the project. It shapes the bag and holds all pieces together. Careful stitching makes the bag strong and durable.
This guide covers how to assemble your cut pieces and use good stitching methods. These tips help you sew a neat and lasting bag body.
Assembling The Pieces
First, match all fabric pieces by size and shape. Lay them flat to check edges and corners. Pin the pieces to keep them from moving while sewing.
- Place the front and back panels right sides together.
- Attach side panels to the front piece edges.
- Pin the bottom piece to the base edges of side panels.
- Make sure all seams line up evenly before sewing.
Stitching Techniques
Use a strong stitch to make the bag last. A straight stitch works well for most seams. Backstitch at the start and end to secure threads.
| Stitch Type | Use | Tips |
| Straight Stitch | Main seams | Use medium stitch length for strength |
| Backstitch | Start and end of seams | Prevents stitches from coming undone |
| Zigzag Stitch | Edge finishing | Prevents fabric fraying |

Credit: www.youtube.com
Creating The Strap
The strap is an important part of your mini messenger bag. It holds the bag securely on your shoulder. Making a strong and comfortable strap takes a few simple steps.
You will learn how to cut the strap to the right size and attach it properly. Follow these instructions for a neat finish.
Cutting The Strap
Choose a sturdy fabric or leather for the strap. Cut it to the right length for comfort and style. The strap should be long enough to wear across your body.
- Measure from one shoulder to the opposite hip.
- Add 4 inches for adjustment and seams.
- Cut a strip about 1.5 to 2 inches wide.
- Use sharp scissors for clean edges.
- If using fabric, fold edges and iron them flat.
Attaching The Strap
Secure the strap to the bag with strong stitches or hardware. Make sure it can carry the weight of the bag without pulling loose.
| Attachment Method | Materials Needed | Notes |
| Sewing | Needle, strong thread | Use double stitches for strength |
| Rivets | Rivets, hammer | Good for leather straps |
| Clips or Rings | Metal rings, clips | Allows strap removal |
Adding Pockets And Closures
Adding pockets and closures makes your mini messenger bag practical and secure. Pockets help organize items, while closures keep them safe inside.
Choosing the right placement for pockets and the best closure style is important for both function and style. Let’s explore these two key parts.
Pocket Placement
Pockets can be placed inside or outside the bag. Inside pockets keep small items hidden. Outside pockets offer quick access to essentials.
- Front pocket for phone or keys
- Side pockets for water bottles or small umbrellas
- Inside zippered pocket for money or cards
- Back pocket for receipts or tickets
Think about what you carry daily. Place pockets where you can reach items easily without opening the main bag.
Choosing Closures
Closures keep your bag’s contents safe and add style. Some closures are easy to open, while others are more secure.
| Closure Type | Ease of Use | Security | Style |
| Magnetic Snap | Easy | Moderate | Simple and clean |
| Zipper | Moderate | High | Casual or sporty |
| Buckle | Slow | High | Classic or vintage |
| Velcro | Very Easy | Low | Informal |
Select a closure that fits your bag’s style and how often you need to open it. Combine closures if you want extra security and ease.
Finishing Touches
Completing a mini messenger bag is exciting. Adding final details makes it unique and personal.
These finishing touches ensure your bag looks polished and professional. Let’s explore the final steps.
Edge Finishing
Edge finishing gives your bag a clean look. It helps to protect the fabric from fraying.
- Use a zigzag stitch along the edges.
- Apply fabric sealant for extra durability.
- Consider using binding tape for a neat finish.
Decorative Details
Adding decorative details can enhance the appearance of your mini messenger bag. They reflect your personal style.
- Choose colors that match your bag’s theme.
- Add buttons or snaps for extra flair.
- Include personalized tags or labels inside the bag.
Tips For Customization
Creating a mini messenger bag allows for endless customization. Let your creativity shine with unique designs.
Explore different styles and add personal touches. Make your bag truly one-of-a-kind.
Color Combinations
Colors bring life to your mini messenger bag. Choose colors that reflect your style.
Mix and match to create eye-catching effects. Experiment with different shades.
- Pastels create a soft, gentle look
- Bold colors make a strong statement
- Neutral tones give a classic appearance
Personalizing Your Bag
Personal touches make your bag special. Add initials or a favorite symbol.
Use patches, pins, or embroidery. These elements add personality to your bag.
- Embroider your name or a fun word
- Attach pins that show your interests
- Sew on patches for added flair
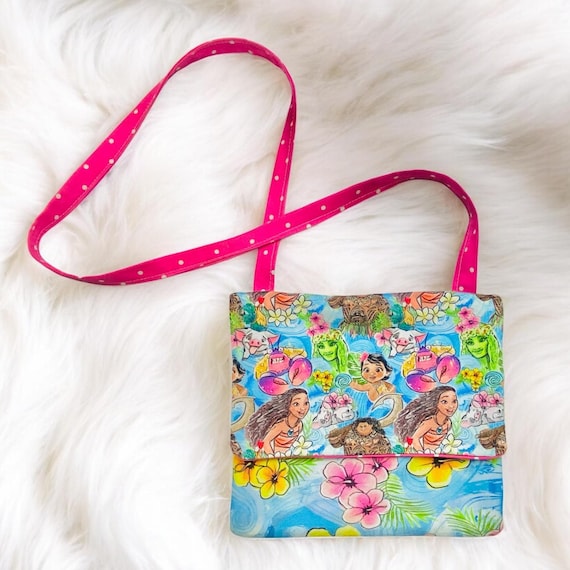
Credit: www.etsy.com
Frequently Asked Questions
What Materials Are Needed To Make A Mini Messenger Bag?
To make a mini messenger bag, you need fabric, lining, interfacing, thread, a zipper or magnetic snap, scissors, and a sewing machine or needle. Choose durable materials like canvas or faux leather for strength and style. Accessories like buckles or straps add functionality and design.
How Long Does It Take To Sew A Mini Messenger Bag?
Sewing a mini messenger bag usually takes 2 to 4 hours. The time varies based on your sewing skill and design complexity. Beginners may take longer, while experienced sewers can finish faster. Planning and cutting materials efficiently reduce overall project time.
Can I Customize The Size Of My Mini Messenger Bag?
Yes, you can easily customize the size by adjusting the pattern dimensions. Measure your essentials to decide the perfect size. Modify length, width, and strap length to suit your needs. Custom sizing ensures your bag is both practical and stylish.
What Sewing Techniques Are Best For Mini Messenger Bags?
Use straight stitch for seams and topstitching for durability and neatness. Reinforce stress points with backstitch or double stitching. Apply interfacing for structure. These techniques ensure a strong, professional finish and increase the bag’s lifespan.
Conclusion
Making a mini messenger bag is simple and fun. You need only a few materials and basic steps. This bag fits small items and looks stylish. Practice sewing to improve your skills. Personalize the bag with colors or patches you like.
Carry it anywhere, for work or casual outings. Keep trying, and you will create great bags. Enjoy your new handmade accessory every day.


