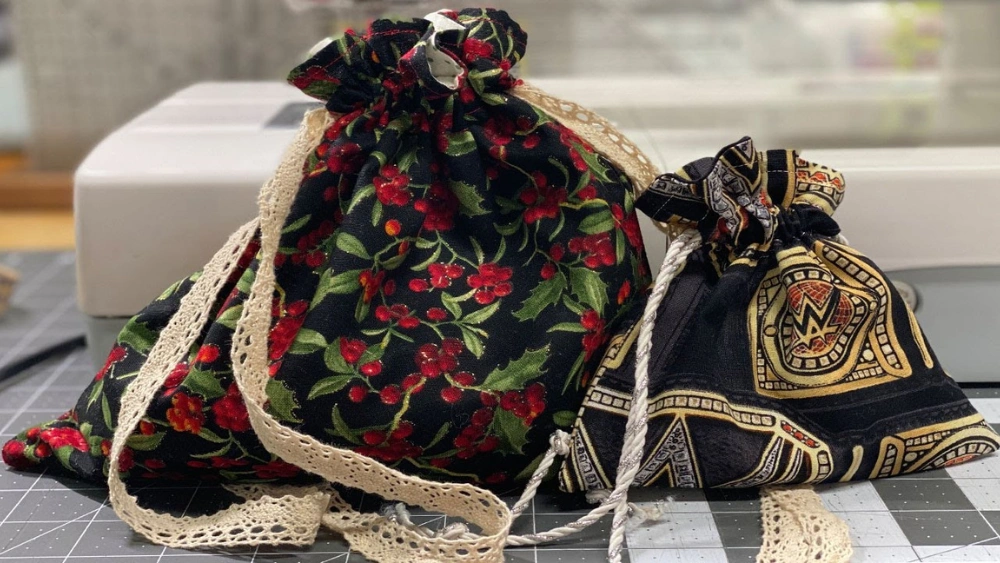
Have you ever wanted a stylish, sturdy bag that fits your needs perfectly? Learning how to sew a lined drawstring bag is easier than you think—and once you make one, you’ll wonder why you didn’t start sooner.
Imagine having a bag that keeps your belongings safe, looks great, and is made by your own hands. In this guide, you’ll discover simple steps that anyone can follow, even if you’re new to sewing. Ready to create a bag that’s both practical and personal?
Let’s get started!
Materials Needed
To sew a lined drawstring bag, you need some basic materials. These items help you create a strong and neat bag.
Gather your materials before you start. This saves time and makes sewing easier.
Fabric Choices
Choose fabrics that are easy to sew and strong. Cotton is a popular choice for both lining and outer fabric.
You can also use canvas or denim for a sturdier bag. Pick a lighter fabric for the lining to keep the bag flexible.
- Cotton fabric for outer layer
- Canvas or denim for a durable bag
- Lightweight cotton or polyester for lining
- Matching or contrasting colors to your style
Additional Supplies
Besides fabric, you need other tools to make your bag. These help you cut, sew, and finish the bag properly.
Make sure to have a good quality drawstring cord. It should be strong and easy to pull through the casing.
- Sewing machine or needle and thread
- Scissors or rotary cutter
- Measuring tape or ruler
- Pins or clips to hold fabric
- Drawstring cord or ribbon
- Safety pin to help thread the drawstring
- Iron for pressing seams

Credit: www.youtube.com
Cutting The Fabric
Cutting the fabric is the first step to make a lined drawstring bag. You need to cut both the outer fabric and the lining fabric carefully. This ensures the bag will have a neat shape and fit together well.
Use sharp scissors or a rotary cutter for clean edges. Always measure twice before cutting to avoid mistakes.
Measuring Dimensions
Start by deciding the size of your drawstring bag. Measure the width and height you want. Add extra space for seams and the drawstring channel.
Write down the final measurements. These help you cut the fabric pieces accurately.
- Decide the bag’s finished width and height
- Add 1 inch (2.5 cm) for seam allowances on all sides
- Add 2 inches (5 cm) for the drawstring casing at the top
- Double check your measurements before cutting
Cutting Outer And Lining Pieces
Cut one piece of outer fabric and one piece of lining fabric using your measurements. Both pieces should be the same size. This keeps the bag even and easy to sew.
Place the fabric flat on a cutting surface. Use pins or weights to hold the fabric steady. Cut slowly along your measured lines.
- Cut one outer fabric piece
- Cut one lining fabric piece matching the outer piece
- Keep seam allowances included in your cuts
- Label the pieces if needed to avoid confusion
Sewing The Outer Bag
Sewing the outer bag is the first step in making a lined drawstring bag. You start by joining the fabric pieces to form the main shape.
This part focuses on stitching the sides and preparing the top for the drawstring casing.
Stitching Sides
Place the two outer fabric pieces right sides together. Align the edges carefully to avoid uneven seams.
Sew along both sides using a straight stitch, leaving the top open. Use a 1/2 inch seam allowance for strength.
- Pin the edges before sewing to keep fabric from shifting
- Backstitch at the start and end of each seam for durability
- Press seams open with an iron for a clean finish
Creating The Drawstring Casing
Fold the top edge of the bag down twice, about 1/2 inch each fold, to hide raw edges. Press the folds with an iron.
Sew around the folded edge, leaving a small gap to insert the drawstring later. Make sure the stitching is straight and even.
- Use pins to hold the fold in place while sewing
- Leave about 1 inch open for the drawstring channel
- Check that the casing is wide enough for your drawstring
Sewing The Lining
Sewing the lining gives your drawstring bag a neat finish. It hides raw edges and adds strength. The lining also protects your bag’s contents.
Below are two important parts: assembling the lining and leaving an opening. Follow these steps carefully to sew the lining properly.
Assembling The Lining
Start by placing the lining fabric pieces right sides together. Pin the edges to hold them in place. Sew along the sides and bottom with a straight stitch. Use a ½ inch seam allowance for neat seams.
- Place lining pieces right sides together
- Pin the edges carefully
- Sew sides and bottom using ½ inch seam allowance
- Press seams open with an iron
- Turn the lining right side out
Leaving An Opening
You need to leave a small opening to turn the bag inside out after sewing. This opening is usually on the bottom seam of the lining. Mark the spot before sewing and skip sewing that part.
| Purpose | How to Leave Opening | Opening Size |
| Turn bag inside out | Do not sew a 3-inch section on bottom seam | 3 inches (7.5 cm) |
| Close opening later | Hand stitch or machine sew after turning | Use matching thread |
Joining Outer Bag And Lining
Sewing a lined drawstring bag is a fun project. Joining the outer bag and lining is an important step. It makes the bag sturdy and neat.
Learn how to insert the lining and topstitch the edges. These steps will help you create a professional-looking bag.
Inserting The Lining
First, turn the outer bag inside out. The lining should be right side out. Place the lining inside the outer bag.
Align the top edges of the lining and outer bag. Pin them together carefully. Make sure the side seams match.
- Use sewing pins to hold the fabric in place
- Check that the lining fits smoothly inside
- Ensure the seams are even
Topstitching The Edges
Next, sew around the top edge of the bag. This will join the outer bag and lining firmly together.
Topstitch close to the edge for a clean look. This also adds strength to the bag’s top.
| Needle Type | Universal |
| Stitch Length | Medium |
| Thread Color | Match fabric |

Credit: www.youtube.com
Adding The Drawstring
Sewing a lined drawstring bag is a fun and useful project. Adding the drawstring is the final step to complete your bag.
In this part, you will learn how to thread the cord and secure the ends for a neat finish.
Threading The Cord
Threading the cord is simple if you follow these steps. Use a safety pin to help guide the cord through the casing.
- Attach a safety pin to one end of the cord.
- Insert the pin into the opening of the casing.
- Push and pull the pin through the fabric until it comes out the other end.
- Remove the safety pin and adjust the cord’s length.
Securing The Ends
Securing the ends of the cord is important to prevent fraying. You can use knots or other methods to keep them tidy.
- Tie a knot at each end of the cord.
- Consider adding a bead for decoration and extra security.
- Trim any excess cord after securing.
Finishing Touches
After sewing the main parts of the lined drawstring bag, the final steps make it look neat and last longer. These finishing touches help close the lining and give the bag a smooth, polished look.
Pay close attention to these details to make sure your bag is both strong and attractive. The last steps include closing the lining opening and giving the whole bag a final press and inspection.
Closing The Lining Opening
The lining has a small opening left for turning the bag right side out. This opening needs to be closed carefully by hand or machine.
Use a hidden stitch for a clean finish or topstitch close to the edge for extra strength. Make sure the seam is smooth and matches the rest of the lining.
- Pin the opening edges together to keep fabric aligned
- Use small, even stitches for a neat look
- Secure the thread ends well to avoid unraveling
- Trim any loose threads after stitching
Final Press And Inspection
Press the entire bag with an iron to remove wrinkles and set the seams. Use the right heat setting for your fabric to avoid damage.
Check your bag carefully for any loose threads, uneven stitches, or fabric puckers. Fix any small issues before using the bag.
- Use steam to smooth out the fabric
- Turn the bag inside out and press the seams flat
- Make sure drawstring channels are clear and even
- Trim all stray threads for a tidy finish

Credit: sewcraftyme.com
Frequently Asked Questions
What Materials Are Needed To Sew A Lined Drawstring Bag?
You need fabric for the outer and lining layers, matching thread, drawstring cord, scissors, pins, and a sewing machine. Choose sturdy fabrics like cotton or canvas for durability and ease of sewing.
How Do You Sew The Lining Inside The Drawstring Bag?
Sew the lining separately, then place it inside the outer bag with wrong sides together. Attach the top edges, leaving an opening for the drawstring casing.
What Is The Best Fabric For A Lined Drawstring Bag?
Cotton and canvas are ideal because they are durable, easy to sew, and washable. Choose a contrasting fabric for the lining to add style.
How Do You Create The Drawstring Casing For The Bag?
Fold the top edge of the bag twice to form a casing. Sew close to the fold, leaving space to insert the drawstring cord easily.
Conclusion
Sewing a lined drawstring bag is a fun and useful project. You can personalize it with your favorite fabric and colors. The lining makes the bag stronger and neater inside. Practice sewing straight lines and take your time. Soon, you will have a handmade bag ready to use or gift.
Keep trying and enjoy creating simple, handy items at home. This skill grows with each project you complete. Happy sewing!