
Are you tired of soggy sandwiches and lukewarm drinks by lunchtime? Making your own insulated lunch bag can change the way you enjoy your meals on the go.
Imagine having a bag that keeps your food fresh and cool all day long, without spending a fortune. In this guide, you’ll discover simple steps to create a practical and stylish insulated lunch bag tailored just for you. Ready to upgrade your lunch game?
Let’s dive in and make your meals better than ever.

Credit: www.youtube.com
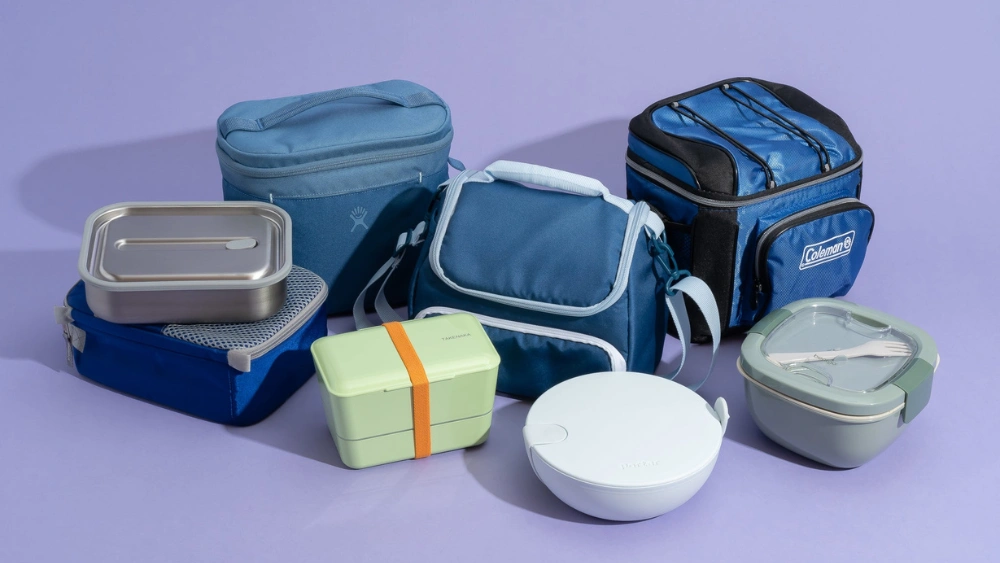
Materials Needed
Making an insulated lunch bag needs some basic materials. These materials keep food fresh and bags durable.
Choosing the right fabric, insulation, and supplies helps you build a strong and useful lunch bag.
Choosing Fabric
Select fabric that is strong and easy to clean. The outside fabric should resist water and stains.
Inside fabric needs to be food safe and wipeable. Cotton, nylon, or polyester work well.
- Water-resistant polyester or nylon for outside
- Cotton or wipeable vinyl for inside lining
- Strong thread to hold pieces together
Insulation Options
Insulation keeps food cold or warm inside the bag. Choose the right type to fit your needs.
Foam and thermal batting are common. Reflective foil adds extra heat protection.
- Closed-cell foam sheets for thick insulation
- Thermal batting for soft padding
- Reflective foil for heat reflection
- Combination of foam and foil for best results
Additional Supplies
Extra supplies make sewing and finishing easier. They also help the bag keep its shape.
Use zippers, Velcro, or snaps to close the bag. Add handles or straps for carrying.
- Zippers or Velcro strips for closure
- Bias tape or binding for edges
- Handles or shoulder straps
- Heavy-duty sewing thread
- Scissors, pins, and measuring tape

Credit: www.youtube.com
Preparing The Fabric
Preparing the fabric is the first step to make an insulated lunch bag. Choose materials that keep food warm or cold.
Proper preparation helps the bag last longer and work better for insulation.
Measuring And Cutting
Measure the fabric pieces carefully before cutting. Accurate sizes make sewing easier.
- Use a ruler or measuring tape for exact lengths.
- Mark the fabric lightly with a pencil or fabric chalk.
- Cut the fabric with sharp scissors or a rotary cutter.
- Include extra fabric for seams and hems.
- Cut all layers, including insulation and lining materials.
Marking For Assembly
Marking the fabric pieces helps you align and sew them correctly.
| Mark Type | Purpose |
| Notches | Match edges during sewing |
| Darts | Create shape and curves |
| Seam Allowance Lines | Guide sewing lines |
| Button or Velcro Placement | Attach closures accurately |
Sewing The Insulation
Sewing insulation into your lunch bag helps keep food fresh and cool. This step adds a layer that blocks heat and cold. Proper sewing makes the bag sturdy and effective.
Use careful stitches to attach insulation without shifting it. The goal is to secure the insulation firmly to the fabric for long-lasting use.
Attaching Insulation To Fabric
Start by cutting the insulation slightly smaller than your fabric pieces. This avoids extra bulk at the seams. Pin the insulation to the fabric before sewing.
- Place fabric right side down on your work surface.
- Lay the insulation on top, centering it carefully.
- Pin the layers together around the edges.
- Sew close to the edge with a straight stitch.
- Remove pins as you sew to keep fabric smooth.
Ensuring Proper Fit
Check the fit of the insulation inside the fabric pieces before final sewing. Adjust if the insulation is too loose or tight. Proper fit ensures the bag holds its shape well.
| Fit Issue | Fix |
| Insulation too large | Trim edges slightly before sewing |
| Insulation too small | Use larger insulation or add an extra layer |
| Shifting during sewing | Pin well or use fabric clips |
| Bulky seams | Trim insulation near seams carefully |
Constructing The Bag
Making an insulated lunch bag needs care and the right steps. This guide shows how to sew the main body and add the lining. Follow these clear steps to build your bag.
The main body forms the bag’s shape and strength. The lining adds insulation to keep food fresh and cool. Both parts need good stitching and materials.
Sewing The Main Body
First, cut your outer fabric and insulation to the right sizes. Use sturdy fabric like canvas or nylon for the outside. The insulation can be foam or thermal batting.
- Place the insulation on the wrong side of the outer fabric.
- Pin the layers together to keep them from shifting.
- Sew along the edges with a straight stitch, leaving the top open.
- Attach the bottom and side pieces to form the bag shape.
- Double stitch the corners for extra strength.
Adding The Lining
The lining keeps the inside clean and adds insulation. Use waterproof or easy-to-clean fabric. Cut the lining pieces slightly smaller than the main body.
| Step | Action |
| Cut | Cut lining fabric pieces to fit inside the bag. |
| Pin | Pin lining pieces together, right sides facing. |
| Sew | Sew sides and bottom, leaving the top open. |
| Attach | Insert lining into the main body, wrong sides touching. |
| Finish | Sew around the top edge to join lining and main body. |
Adding Closures And Handles
Adding closures and handles makes your insulated lunch bag easy to use and carry. Closures keep the bag sealed to keep food fresh. Handles help you hold or hang the bag comfortably.
In this guide, you will learn how to install zippers or velcro closures and attach handles or straps to your lunch bag.
Installing Zippers Or Velcro
Choose a zipper or velcro strip based on your sewing skills and bag design. Zippers offer a tight seal, while velcro is quicker to attach and open.
- Measure the opening of your lunch bag to get the right length of zipper or velcro.
- Pin the zipper or velcro tape along the edge where you want it installed.
- Sew the zipper or velcro carefully using a strong stitch.
- Test the closure to ensure it opens and closes smoothly.
Attaching Handles Or Straps
Handles or straps make carrying easier. You can use fabric, webbing, or leather for strong handles. Attach them firmly to the bag’s sides.
| Material | Best Use | Attachment Method |
| Fabric | Soft, flexible handles | Sew directly to bag edges |
| Webbing | Durable and strong | Double stitch or rivet |
| Leather | Stylish and sturdy | Use rivets or heavy-duty thread |
Finishing Touches
Completing an insulated lunch bag requires attention to detail. Finishing touches ensure durability and style.
These final steps add strength and flair to your handmade bag. Make it both practical and pleasing.
Reinforcing Seams
Reinforce seams to enhance the bag’s strength. Strong seams prevent wear and tear over time.
Use double stitching on all major seams. This technique adds extra protection and durability.
- Double stitch bottom edges
- Secure handles with extra stitching
- Use a zigzag stitch for flexibility
Adding Decorative Elements
Decorative elements make your lunch bag unique. Personal touches add charm and personality.
Consider adding patches or fabric paint. These simple additions can brighten up your bag.
- Choose colorful patches
- Use fabric markers for custom designs
- Add buttons for a playful look
Care And Maintenance
Keeping your insulated lunch bag clean and well-maintained is important. This ensures it stays hygienic and lasts longer.
Regular care helps prevent smells and keeps your food safe. Follow these tips for effective maintenance.
Cleaning Tips
It’s important to clean your lunch bag regularly. This removes food particles and bacteria.
- Empty the bag after each use to avoid crumbs and spills.
- Use mild soap and warm water to wash the inside and outside.
- Let it air dry completely before storing to prevent mold.
Storage Suggestions
Proper storage keeps your lunch bag in good shape. Follow these guidelines to store it correctly.
| Storage Tip | Why It’s Important |
| Keep in a cool, dry place | Prevents damage from heat and moisture |
| Avoid heavy items on top | Maintains the bag’s shape |
| Store with the zipper open | Allows air circulation to avoid odors |
Credit: www.greensafaris.com
Frequently Asked Questions
What Materials Are Best For Making Insulated Lunch Bags?
The best materials include thermal fabric, foam insulation, and waterproof lining. These materials keep food fresh and maintain temperature. Durable outer fabric ensures long-lasting use. Combining these layers creates effective insulation for your lunch bag.
How Do You Sew An Insulated Lunch Bag?
Start by cutting fabric and insulation to size. Sew insulation between outer and inner fabric layers. Use strong stitches and reinforce edges. Attach zippers or closures for convenience. Follow a simple pattern for neat, functional results.
Can I Make An Insulated Lunch Bag Without A Sewing Machine?
Yes, hand sewing is possible using strong needle and thread. Use tight, even stitches to ensure durability. Reinforce stress points like corners and handles. Though slower, hand sewing can produce a sturdy insulated lunch bag.
How To Clean And Maintain An Insulated Lunch Bag?
Spot clean with mild soap and water regularly. Air dry completely to prevent mold and odors. Avoid harsh chemicals that damage insulation. Proper cleaning extends the bag’s lifespan and keeps it hygienic.
Conclusion
Making an insulated lunch bag at home saves money and helps the environment. You can choose materials that keep food fresh and cool. This simple project fits your style and needs perfectly. It feels good to carry a lunch bag you made yourself.
Try it today and enjoy fresh meals wherever you go. Small steps like this make daily life better and easier. Give it a shot and see the difference!


