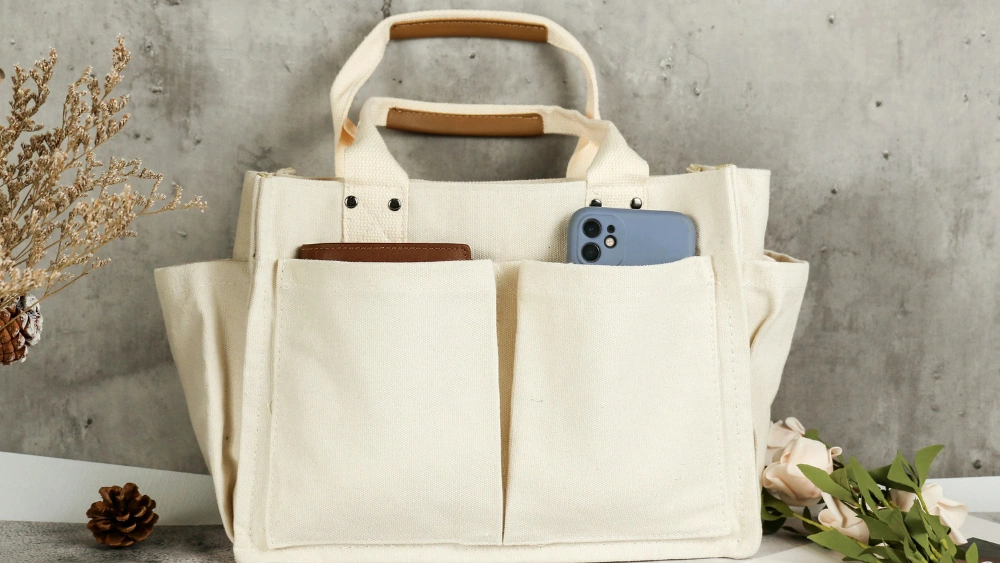
Are you ready to create a beautiful, practical quilted tote bag that’s all your own? Imagine having a stylish bag with handy pockets to keep your things organized wherever you go.
Making your own quilted tote bag is easier than you think, and you’ll feel proud carrying something made by your own hands. In this guide, you’ll discover simple steps to craft a durable, eye-catching tote with pockets designed just for you.
Keep reading, and let’s turn your fabric and creativity into a bag you’ll love using every day.
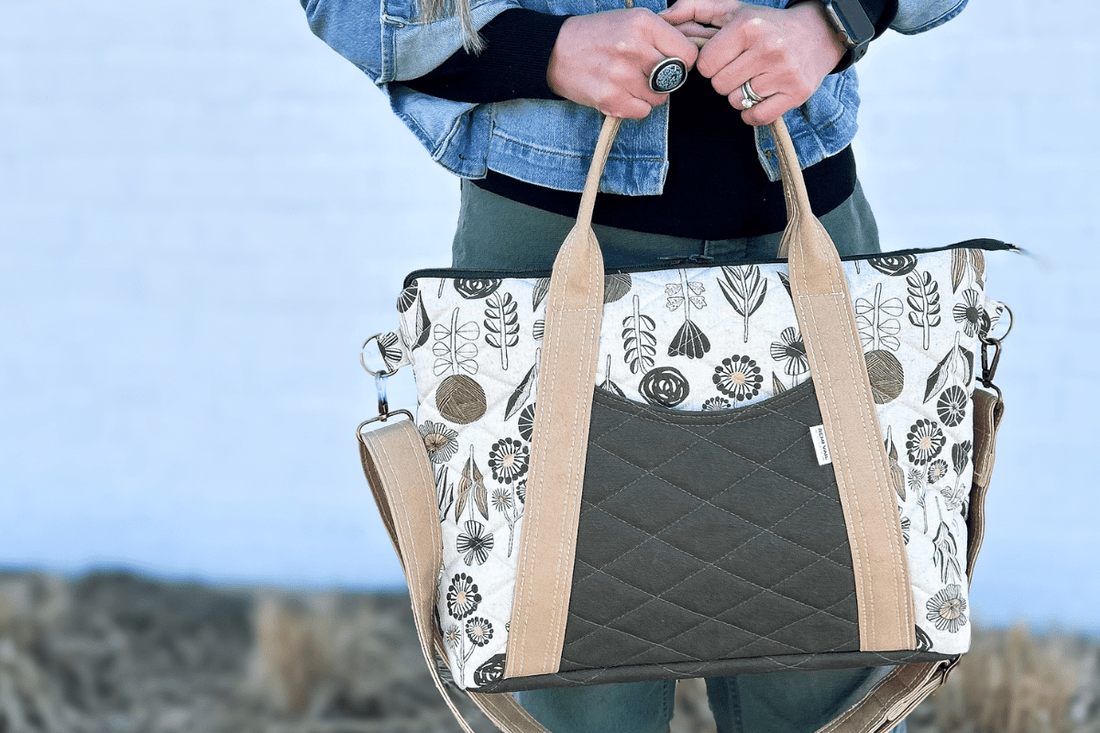
Credit: remivailstudio.com
Materials Needed
Making a quilted tote bag with pockets is a fun project. You need some basic materials to start sewing.
Gathering the right supplies helps your bag look neat and last long.
Fabric
Choose cotton fabric for the main body of the tote. Cotton is easy to sew and durable.
You will need fabric for the outer bag, lining, and pockets.
- Outer fabric: 1 yard
- Lining fabric: 1 yard
- Fabric for pockets: 1/2 yard
Batting
Batting adds padding and shape to your quilted tote. Use cotton or polyester batting.
Cut batting pieces the same size as your fabric panels for quilting.
Thread
Pick a strong thread for sewing the tote bag. Polyester thread works well for durability.
Match the thread color to your fabric for a clean look.
Sewing Machine And Needles
A sewing machine speeds up the sewing process. Use a needle made for quilting or heavy fabric.
Test your needle and thread on scrap fabric before starting the bag.
Handles
Handles can be made from fabric or purchased ready-made. Choose sturdy handles for carrying weight.
- Fabric strips for sewn handles
- Pre-made bag handles (optional)
Additional Supplies
Other tools help you finish your tote bag neatly and safely.
- Scissors or rotary cutter
- Cutting mat
- Pins or clips
- Measuring tape or ruler
- Iron and ironing board
- Marking tools (chalk or fabric pen)

Credit: m.youtube.com
Choosing Fabric And Batting
Making a quilted tote bag with pockets starts with picking the right fabric and batting. These choices affect the bag’s look, feel, and strength.
Good fabric and batting make your tote durable and easy to sew. They also help your bag keep its shape and protect your items.
Selecting The Best Fabric
Choose fabric that is strong and easy to clean. Cotton fabric is a popular choice because it is durable and comes in many colors and patterns.
Look for fabrics with a tight weave. This helps the bag hold its shape and last longer. Avoid very thin or stretchy fabrics as they may not be strong enough.
- Use 100% cotton or canvas for durability
- Pick prints or colors you like for the outside
- Choose a simple fabric for the inside lining
- Prewash fabric to avoid shrinking later
Choosing The Right Batting
Batting goes inside the fabric layers. It adds softness, thickness, and structure to your tote bag. The right batting makes your bag feel padded.
Look for batting that is firm but not too thick. Polyester or cotton-poly blends are easy to work with and give good support.
- Use lightweight or medium-weight batting for bags
- Avoid thick batting that makes sewing hard
- Polyester batting holds shape well and resists wrinkles
- Cotton batting is natural and soft but may shrink
Cutting Fabric Pieces
Cutting fabric pieces accurately is important for making a quilted tote bag. It helps the bag fit together well and look neat. You will need to cut several pieces for the bag body, lining, pockets, and handles.
Use sharp fabric scissors or a rotary cutter with a cutting mat. Mark the fabric carefully using a ruler and fabric chalk or a washable marker. Take your time to avoid mistakes.
Fabric For The Main Bag
Cut the main fabric for the outside of the bag and the lining fabric. These pieces should be the same size to fit together perfectly when sewing.
- Cut two rectangles, each 15 inches wide by 12 inches tall, for the outer bag.
- Cut two rectangles of the same size for the lining fabric.
- Cut two thin strips, 4 inches wide by 24 inches long, for the bag handles.
Fabric For Quilting And Pockets
Cut fabric pieces for the quilted panels and pockets. These add style and function to your tote bag. You can mix colors and patterns to make it unique.
| Piece | Size | Notes |
| Quilted front panel | 14 inches by 11 inches | Use batting underneath |
| Inside pocket | 7 inches by 9 inches | Fold edges before sewing |
| Outside pocket | 8 inches by 10 inches | Add decorative stitching |
Cutting Tips And Tricks
Follow these tips to make cutting easier and more accurate. Proper preparation saves time and fabric.
- Wash and iron your fabric before cutting.
- Use a clear ruler to measure and mark.
- Cut slowly and steadily for straight edges.
- Double-check measurements before cutting.
- Keep fabric flat and smooth on your cutting surface.
Creating The Quilted Panels
Making the quilted panels is an important step in crafting your tote bag. These panels add strength and style to your bag.
You will work with fabric and batting to create layers that are soft and durable. Sewing quilt lines keeps everything in place.
Layering Fabric And Batting
Start by cutting your fabric and batting to the same size. The fabric will be the outside and inside of the panel.
Place one fabric piece right side down, then the batting, and finally the other fabric piece right side up. This sandwich forms your quilted panel.
- Cut fabric pieces slightly larger than your finished panel size
- Use cotton batting for a soft and sturdy feel
- Align all edges carefully before sewing
Sewing The Quilt Lines
Quilt lines hold the fabric and batting together and add texture. Use a sewing machine with a straight stitch to sew the lines.
Sew evenly spaced lines across the panel. You can sew vertical, horizontal, or diagonal lines depending on your design.
- Use a walking foot if your machine has one
- Keep stitch length medium for durability
- Press the panel after sewing to flatten the stitches
Assembling The Tote Bag
Putting your quilted tote bag together is an exciting part of the project. This step combines all the pieces you cut and quilted.
Follow clear steps to sew the main body and add the lining. This will give your tote bag a neat and professional look.
Sewing The Main Body
Start by joining the front and back quilted panels of the tote. Pin the right sides together carefully before sewing.
- Place the front and back panels right sides together.
- Pin all edges to keep the fabric from shifting.
- Sew along the side seams and bottom with a ½ inch seam allowance.
- Press the seams open to reduce bulk.
- Topstitch around the top edge for extra strength.
Adding The Lining
Cut and sew the lining pieces just like the main body. Leave a small gap at the bottom for turning the bag right side out.
| Task | Tip |
|---|---|
| Sew lining panels | Use the same seam allowance as the main body |
| Leave turning gap | About 3-4 inches at the bottom center |
| Attach lining to main body | Pin right sides together along the top edge |
| Turn bag | Pull the bag through the gap to the right side |
| Close gap | Hand stitch or machine sew the opening neatly |
Making And Attaching Pockets
Adding pockets to your quilted tote bag can make it more useful. Pockets help organize items and keep them easy to find.
Follow these steps to cut and sew pockets that are both functional and stylish. Let’s start with cutting the pocket pieces.
Cutting Pocket Pieces
Begin by selecting fabric that matches or complements your tote bag. This will ensure a cohesive look.
- Measure the desired size of your pocket.
- Use fabric scissors to cut two pieces of fabric.
- Remember to add extra fabric for seam allowance.
Sewing Pockets To Panels
After cutting, it’s time to sew the pocket pieces onto the tote bag panels. Proper sewing ensures durability.
Align the pocket pieces carefully.
Pin them in place to avoid shifting.
Sew along the edges, keeping a straight line.
| Action | Details |
| Pinning | Use pins to hold fabric in place |
| Sewing | Stitch along all edges |
| Checking | Ensure pocket is secure |
Adding Handles
Handles are essential for a quilted tote bag. They add style and function. Let’s explore how to choose and attach them.
Good handles make carrying your bag easy and comfortable. This guide helps you select and attach handles securely.
Selecting Handle Material
Choosing the right material for handles is important. Different materials offer various benefits.
Consider these materials for your tote bag handles. Each type has its own unique qualities.
- Cotton webbing is strong and soft.
- Leather adds a classic look.
- Nylon is durable and water-resistant.
- Canvas offers a sturdy feel.
Attaching Handles Securely
Securely attaching handles is crucial. Proper attachment prevents damage and increases longevity.
Follow these steps to ensure your handles are attached well. Strong handles provide better support.
- Measure and mark the placement on the bag.
- Use reinforced stitching for added strength.
- Double-check that handles are even.
- Test handle security before using the bag.
Finishing Touches
After sewing your quilted tote bag, finishing touches make it look neat. They also help your bag last longer.
These final steps include topstitching the edges and pressing the bag. Cleaning is also important before use.
Topstitching Edges
Topstitching adds strength and a polished look to your tote bag edges. It keeps layers from shifting.
Use a sewing machine with a straight stitch. Sew close to the edge for best results.
- Set stitch length to medium for durability
- Start and end with backstitch to secure threads
- Keep stitching line even and straight
- Topstitch around pockets and handles too
Pressing And Cleaning
Press your tote bag with an iron to flatten seams and remove wrinkles. Use the right heat setting for fabric.
Cleaning removes dust and loose threads. A gentle shake or light vacuum helps keep the bag fresh.
- Press inside and outside seams carefully
- Use a pressing cloth to protect fabric
- Shake bag gently to remove loose threads
- Spot clean any marks with mild detergent
Tips For Customizing Your Tote
Making a quilted tote bag with pockets is fun and useful. Customizing your tote lets you add your own style and function.
Here are some easy tips to help you personalize your quilted tote bag. These ideas make your bag unique and practical.
Pick Fabrics That Match Your Style
Choose fabrics that show your personality. Mix patterns and colors for a lively look or use solid colors for a clean style.
Also, pick fabrics that are strong and easy to sew. Cotton and quilting fabric work well for durability and comfort.
Add Different Pocket Sizes
Use pockets of various sizes to keep your items organized. Small pockets hold keys or cards, and bigger ones store books or tablets.
Try sewing some pockets inside and some outside the tote. This gives easy access and extra storage space.
Use Decorative Stitching
Decorative stitches add charm to your quilted tote. Choose colors that contrast or match your fabric for a nice effect.
Try quilting patterns like diamonds, stripes, or waves. These patterns make your bag stronger and more beautiful.
Include Adjustable Straps
Adding adjustable straps lets you change the bag length to fit your needs. Use buckles or sliders for easy adjustment.
This feature makes your tote comfortable for carrying on the shoulder or by hand.
Add Lining And Interfacing
Use lining fabric inside your tote to hide seams and give a clean look. Interfacing adds stiffness for better shape.
Choose a soft lining for comfort and use stiff interfacing if you want your tote to stand upright.
Use Zippers Or Buttons For Closure
Add a zipper or buttons to keep your things safe inside the tote. Zippers offer full closure, while buttons add a decorative touch.
Pick closures that match your bag style and are easy to use.

Credit: quiltingdigest.com
Frequently Asked Questions
What Materials Are Needed For A Quilted Tote Bag?
You need fabric, batting, thread, sewing machine, scissors, and pins. Choose cotton or canvas for durability. Use matching thread and quality batting for a sturdy bag.
How Do I Add Pockets To A Quilted Tote Bag?
Cut fabric pieces for pockets. Sew edges, then attach pockets inside or outside the tote. Reinforce pocket tops for strength.
What Is The Best Batting For Quilting A Tote Bag?
Use cotton or polyester batting for good structure. Cotton offers softness, while polyester adds firmness. Choose based on your desired bag feel.
Can Beginners Sew A Quilted Tote Bag With Pockets?
Yes, beginners can sew this bag with basic skills. Follow step-by-step instructions carefully. Start with simple designs and practice sewing straight lines.
Conclusion
Making a quilted tote bag with pockets is fun and useful. You can carry many things and stay organized. Choose your favorite fabrics and follow the steps carefully. Sewing each part with care will give you a strong, beautiful bag.
Practice makes sewing easier and more enjoyable. This project helps improve your skills and creativity. Try making different sizes or adding extra pockets next time. Enjoy using your handmade tote every day. Keep sewing and creating new things!