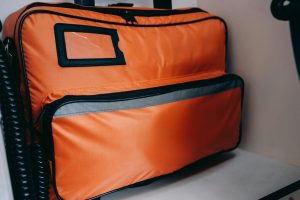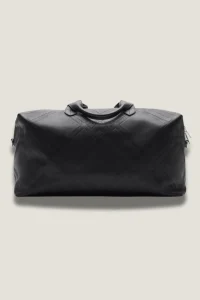

Looking for a stylish and practical bag that you can proudly say you made yourself? Learning how to make a messenger bag with a zipper is easier than you think—and it gives you a unique accessory tailored just for you.
Imagine carrying a bag that fits your style perfectly, keeps your belongings secure, and turns heads wherever you go. In this guide, you’ll discover simple steps to create your own messenger bag, even if you’ve never sewn before. Ready to unlock your creativity and make something truly personal?
Let’s get started!
Materials Needed
Making a messenger bag with a zipper requires some basic materials. Gathering the right supplies helps you create a sturdy and functional bag.
This guide covers fabric choices, zipper options, and additional supplies. Each section explains what you need and why it is important.
Fabric Choices
Choose a fabric that is strong and fits your style. Some fabrics work better for bags because they last longer and hold their shape.
- Canvas: Durable and water-resistant, great for everyday use.
- Denim: Thick and sturdy, offers a casual look.
- Leather or Faux Leather: Gives a sleek and professional finish.
- Heavy Cotton: Easy to sew and comes in many colors.
- Ripstop Nylon: Lightweight and tear-resistant.
Zipper Options
Pick the right zipper to match your bag’s style and use. The zipper should be strong and easy to open and close.
| Zipper Type | Description | Use |
| Metal Zipper | Strong and classic look | Heavy bags and leather |
| Nylon Coil Zipper | Flexible and lightweight | Fabric bags and casual styles |
| Plastic Molded Zipper | Durable and colorful | Outdoor and sporty bags |
| Invisible Zipper | Hidden teeth, neat finish | Stylish, slim bags |
Additional Supplies
Besides fabric and zipper, you need some tools and accessories. These help you cut, sew, and finish your messenger bag.
- Thread: Choose a strong polyester thread matching your fabric color.
- Scissors or Rotary Cutter: For cutting fabric cleanly.
- Measuring Tape or Ruler: To measure pieces accurately.
- Sewing Machine or Needle: For stitching the parts together.
- Pins or Clips: To hold fabric layers while sewing.
- Interfacing: Adds stiffness and shape to the bag.
- Strap Material: Webbing or matching fabric for the shoulder strap.
- Bag Hardware: Buckles, D-rings, and sliders for adjustable straps.

Credit: creativefashionblog.com
Tools Required
Making a messenger bag with a zipper needs some basic tools. These tools help you cut, sew, and measure fabric accurately.
Using the right tools saves time and gives your bag a neat finish. Here are the main tools you will need.
Sewing Machine
A sewing machine makes stitching faster and stronger. It helps attach the zipper and sew the bag pieces together.
Choose a machine that can sew thick fabrics like canvas or denim. A machine with a zipper foot is best for sewing zippers cleanly.
Cutting Tools
Cutting tools shape your fabric pieces. Sharp tools give clean edges and prevent fraying.
- Fabric scissors for cutting cloth
- Rotary cutter for straight, smooth cuts
- Seam ripper to fix mistakes
- Thread snips for trimming threads
Measuring Tools
Measuring tools ensure your bag parts fit well. Accurate measurements keep your design balanced.
| Tool | Use |
| Measuring tape | Measure fabric length and width |
| Ruler | Draw straight lines and check edges |
| Chalk or fabric marker | Mark cutting and sewing lines |
Preparing The Fabric
Preparing your fabric carefully is key to making a good messenger bag with a zipper. This step helps you cut and sew the fabric accurately.
Take your time to measure, cut, and mark the fabric. This makes sewing easier and keeps your bag looking neat.
Measuring And Cutting
Measure the fabric pieces needed for the bag before cutting. Use a ruler or measuring tape for exact sizes. Cut slowly to avoid mistakes.
- Measure the main body piece
- Measure the flap and side panels
- Include extra fabric for seams
- Cut all pieces on a flat surface
- Use sharp scissors for clean edges
Marking Sewing Lines
Mark sewing lines on your fabric to guide stitching. Use a fabric chalk or washable marker. Mark clearly but avoid damaging the fabric.
| Tool | Use |
| Fabric chalk | Draw sewing lines |
| Ruler | Keep lines straight |
| Pins | Hold fabric pieces in place |
| Seam gauge | Measure seam allowances |
Constructing The Bag Body
Building the body of your messenger bag is an important step. It shapes how the bag looks and holds items.
Focus on sewing the main panels and adding structure for a strong, neat bag body.
Sewing Main Panels
Cut two main fabric panels for the front and back of the bag. Use matching pieces for lining.
Place the panels right sides together and pin the edges. Sew along the sides and bottom with a straight stitch.
- Use a 1/2 inch seam allowance for durability
- Backstitch at the start and end to secure stitches
- Trim excess fabric to reduce bulk
- Leave the top open for the zipper and flap
Adding Structure
To keep the bag sturdy, add interfacing or foam between the fabric layers. This helps the bag hold its shape.
Cut the interfacing to match the size of the main panels. Iron it onto the wrong side of the fabric before sewing.
- Use fusible interfacing for easy application
- Choose medium to heavy weight for better support
- Add extra reinforcement at corners and edges
- Check that the fabric and interfacing lay flat together
Attaching The Zipper
Attaching the zipper is an important part of making a messenger bag. The zipper keeps your bag closed and secure.
It is important to attach the zipper carefully so it works well and looks neat.
Pinning Zipper In Place
Start by placing the zipper face down on the edge of the fabric. The zipper teeth should line up with the fabric edge.
Use pins to hold the zipper in place. Pin every few inches to keep the zipper from moving while sewing.
- Place zipper teeth along fabric edge
- Pin zipper tape to fabric every 2 to 3 inches
- Make sure zipper is straight and even
- Check that zipper pull is away from pinning area
Sewing Zipper Securely
Use a zipper foot on your sewing machine. This lets you sew close to the zipper teeth.
Sew slowly and carefully. Backstitch at the start and end to keep the zipper strong.
- Sew close to zipper teeth using zipper foot
- Backstitch at beginning and end of seam
- Remove pins as you sew to avoid breaking needle
- Test zipper by opening and closing it

Credit: creativefashionblog.com
Creating The Strap
The strap is a key part of your messenger bag. It must be strong and comfortable. This section explains how to make the strap from start to finish.
You will measure, cut, sew, and attach the strap to your bag carefully. Follow the steps to get a sturdy and adjustable strap.
Measuring And Cutting Strap
Measure the strap length according to your height and bag size. Add extra length for adjustments and sewing allowances.
- Decide on the strap length (usually 40-50 inches).
- Add 4 inches for sewing seams and adjustments.
- Mark the fabric or leather with chalk or fabric pen.
- Cut the strap carefully using sharp scissors or rotary cutter.
- Cut two pieces if you want a padded or double-layer strap.
Sewing And Attaching Strap
Sew the strap pieces together if you use two layers. Use a strong stitch to hold them firmly. Attach hardware if needed.
| Task | Details |
| Sew layers | Use straight stitch along edges with strong thread |
| Add padding | Insert foam or batting between layers before sewing |
| Attach hardware | Sew D-rings or sliders for length adjustment |
| Secure strap to bag | Use box stitch or reinforced stitching for strength |
Finishing Touches
The final stages of making a messenger bag with a zipper involve adding the lining, reinforcing the seams, and conducting a final inspection. These steps ensure that your bag is sturdy, functional, and visually appealing.
Adding Lining
Adding a lining to your messenger bag provides a smooth interior surface and helps maintain its shape. Choose a lining material that complements your bag’s design and functionality.
- Use a lightweight lining material for a slim design
- Choose a water-resistant lining for a bag that can withstand the elements
- Consider a lining with a texture or pattern to add visual interest
Reinforcing Seams
Reinforcing the seams of your messenger bag ensures that it can withstand regular use and handling. Use a strong thread or yarn to reinforce the seams, and consider adding additional stitching for extra security.
| Reinforcement Method | Description |
| Reinforcing Thread | Use a strong thread or yarn to reinforce the seams |
| Additional Stitching | Add extra stitching to the seams for added security |
| Seam Taping | Use a strong tape to reinforce the seams |
Final Inspection
Conduct a final inspection of your messenger bag to ensure that it meets your quality standards. Check for any defects, such as loose threads or uneven seams, and make any necessary repairs.
With these finishing touches, your messenger bag with a zipper is complete and ready for use.
Tips For Customization
Making a messenger bag with a zipper lets you create a unique and useful item. Customizing your bag adds personal style and practical features.
Small changes can make your bag stand out and work better for your needs. Try adding pockets or decorative touches to personalize your design.
Adding Pockets
Pockets help organize items and keep your bag tidy. You can add inside or outside pockets to hold phones, keys, or pens.
Use different sizes and shapes for pockets. Sew them on the lining or the outside fabric for easy access.
- Front zipper pocket for quick access
- Inside slip pockets for small items
- Side pockets for water bottles
- Hidden back pocket for valuables
Using Decorative Elements
Decorations add personality and style to your messenger bag. You can use embroidery, patches, or fabric paint to create designs.
Try adding buttons, ribbons, or studs to give your bag a unique look. Choose decorations that match your style and the bag’s function.
- Embroidery for initials or patterns
- Patches with fun or meaningful images
- Fabric paint for custom artwork
- Buttons or studs for a vintage touch

Credit: www.youtube.com
Frequently Asked Questions
What Materials Are Needed To Make A Messenger Bag With Zipper?
You need fabric, a zipper, thread, scissors, pins, and a sewing machine. Choose sturdy fabric for durability. A strong zipper ensures secure closure. Basic sewing tools help assemble the bag efficiently.
How Do I Sew A Zipper Into A Messenger Bag?
Pin the zipper to the fabric edges first. Sew slowly with a zipper foot on your machine. Ensure the zipper aligns evenly with the bag opening. This prevents puckering and ensures smooth operation.
Can Beginners Make A Messenger Bag With A Zipper?
Yes, beginners can make this bag with basic sewing skills. Follow step-by-step instructions carefully. Practice sewing straight seams before starting. Take time to align pieces correctly for best results.
How Long Does It Take To Make A Messenger Bag?
Making a messenger bag usually takes 2 to 4 hours. Time varies based on skill level and bag complexity. Preparing materials and sewing carefully impacts the total duration.
Conclusion
Making a messenger bag with a zipper is simple and rewarding. Follow the steps carefully and take your time. Choose the right materials for a strong, useful bag. Sewing the zipper adds security and style. You can customize the bag to fit your needs.
Practice helps improve your sewing skills. Enjoy carrying a bag you made yourself. Keep trying and creating more projects. Sewing can be fun and practical. Start your messenger bag today and feel proud.