Have you ever wanted a stylish, handmade bag that’s both practical and fun to create? Knitting a drawstring bag is easier than you think, even if you’re new to knitting.
Imagine having a unique bag that fits your style perfectly and shows off your creativity. In this guide, you’ll discover simple steps to make your own drawstring bag, using basic stitches and materials. By the end, you’ll not only have a beautiful bag but also a new skill that can impress your friends and add a personal touch to your daily life.
Ready to get started? Let’s dive in!

Credit: m.youtube.com
Materials Needed
Knitting a drawstring bag requires a few simple materials. Choosing the right supplies helps your project look neat and last long.
Below are key points to consider before you start knitting your bag. These include picking yarn and selecting needles and other tools.
Choosing The Right Yarn
Yarn choice affects the bag’s texture and strength. Use medium-weight yarn made of cotton or acrylic for durability and easy care.
- Choose yarn labeled as worsted or aran weight.
- Cotton yarn is sturdy and great for bags.
- Acrylic yarn is affordable and comes in many colors.
- Avoid very thin or fuzzy yarns that can wear out quickly.
- Pick colors you like for your bag’s style.
Selecting Needles And Accessories
Needles and accessories help you knit smoothly and finish the bag well. Use the right needle size to match your yarn.
| Accessory | Purpose |
| Knitting needles (size 7-9 US) | Works best with medium-weight yarn |
| Tapestry needle | For sewing and weaving ends |
| Scissors | To cut yarn cleanly |
| Stitch markers | To mark bag sections or pattern repeats |
| Measuring tape | To check bag size |

Credit: www.youtube.com
Basic Knitting Techniques
Knitting a drawstring bag is easy when you know the basics. This guide covers simple knitting skills to start your project.
Learning to cast on, knit, purl, and bind off will help you create a neat and strong bag.
Casting On Stitches
Casting on means making the first row of stitches on your needle. It is the base for all knitting projects.
The long tail cast on is a simple and common way to start. It gives a nice edge and is easy to learn.
- Make a slip knot and place it on one needle.
- Hold the yarn tail and working yarn in your hands.
- Use your fingers to loop the yarn around the needle.
- Pull the yarn through to create new stitches.
- Repeat until you have the number of stitches needed.
Knit And Purl Stitches
The knit stitch is the most basic stitch. It creates a smooth “V” shape on the fabric front.
The purl stitch looks like small bumps and is the opposite of knit. Using both gives texture to your bag.
- To knit, insert the needle from front to back.
- Wrap the yarn around the needle.
- Pull the yarn through and slide the old stitch off.
- To purl, insert the needle from back to front.
- Wrap the yarn and pull through as with knit.
Binding Off
Binding off finishes your knitting and keeps stitches from unraveling. It creates a firm edge.
You bind off by knitting two stitches, then lifting the first over the second. Repeat to the end.
- Knit two stitches.
- Lift the first stitch over the second and off the needle.
- Knit one more stitch.
- Repeat lifting the previous stitch over the new stitch.
- Continue until one stitch remains.
- Cut yarn and pull it through the last stitch to secure.
Creating The Bag Body
Knitting a drawstring bag starts with making the main body. This part forms the base and sides of the bag.
Focus on even stitches and proper shaping to ensure the bag looks neat and holds its shape well.
Knitting The Main Panel
Begin by casting on the number of stitches needed for the bag’s width. Knit rows back and forth for the length.
- Use a medium-weight yarn for good structure.
- Knit every row for a garter stitch texture.
- Check your stitch count regularly.
- Measure length to fit your desired bag size.
- Keep tension even to avoid uneven edges.
Shaping The Sides
To shape the sides, decrease stitches evenly on each edge. This creates a slight curve for the bag’s form.
| Row | Action | Stitches Decreased |
|---|---|---|
| 1 | Decrease 1 stitch at each edge | 2 |
| 3 | Decrease 1 stitch at each edge | 2 |
| 5 | Decrease 1 stitch at each edge | 2 |
| 7 | Stop decreasing, knit straight | 0 |
Adding The Drawstring
Adding a drawstring is the final step in making your knitted bag functional. The drawstring lets you open and close the bag easily.
In this guide, you will learn how to make eyelets for the string and craft the drawstring cord itself.
Making Eyelets For The String
Eyelets are small holes in your knitted bag that let the drawstring pass through. You can make them while knitting or add them later.
- Decide where you want the eyelets, usually near the top edge.
- Knit two stitches together to create a small hole.
- On the next row, make a yarn over stitch above the hole.
- Repeat this pattern evenly around the bag.
These simple eyelets will hold the drawstring securely and look neat on your bag.
Crafting The Drawstring Cord
The drawstring cord can be made in several ways. Choose one that fits your knitting skills and the style of your bag.
| Method | Description | Tools Needed |
| i-cord | A narrow, round knitted cord made on double-pointed needles. | Double-pointed needles |
| Braided | Three or more strands of yarn braided together. | None, just yarn |
| Chain Stitch | A crochet chain made with a hook for a simple cord. | Crochet hook |
Once your cord is ready, thread it through the eyelets and tie the ends. Your drawstring bag is now complete.
Finishing Touches
After knitting your drawstring bag, the final steps make it neat and durable. These finishing touches help the bag hold its shape and last longer.
Two key tasks remain: seaming and assembly, then weaving in ends. Both ensure your bag looks clean and feels good to use.
Seaming And Assembly
Seaming joins the knitted pieces together. Use a yarn needle and matching yarn for a smooth finish. Align edges carefully before stitching.
- Place the bag pieces right sides together.
- Thread a yarn needle with yarn.
- Use mattress stitch to join the sides.
- Close the bottom seam with the same stitch.
- Turn the bag right side out to check the seams.
Weaving In Ends
Weaving in loose ends stops the yarn from unraveling. Hide the ends inside stitches to keep your work tidy.
| Tip | How to Do It |
|---|---|
| Use a Tapestry Needle | Thread the needle with the yarn tail for easy weaving. |
| Weave in Both Directions | Go back and forth through stitches to secure the yarn. |
| Trim Excess | Cut yarn close to the fabric after weaving. |
| Check for Loose Ends | Run your fingers over the seams to find any loose yarn. |
Styling Ideas
Knitting a drawstring bag offers creative styling possibilities. Choose colors and patterns that reflect your personal taste.
Consider embellishments and accessories to make your bag unique and stylish.
Color And Pattern Choices
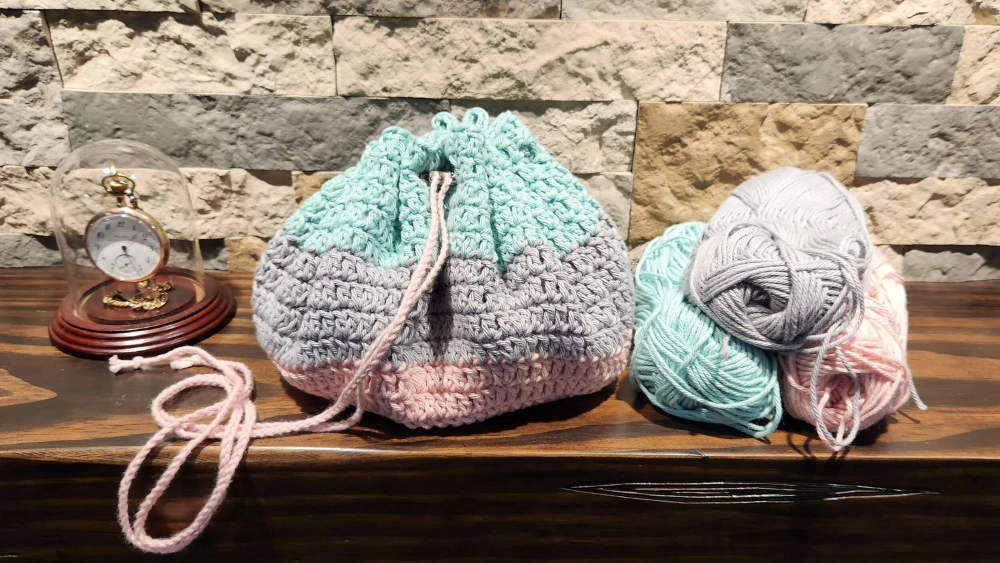
Colors and patterns set the mood for your drawstring bag. Bright colors are cheerful, while pastels are calming.
- Striped patterns add a fun element.
- Floral designs are great for a vintage look.
- Geometric shapes give a modern touch.
Embellishments And Accessories
Adding embellishments can transform a simple bag into something special. Consider using different types of accessories to stand out.
| Embellishment | Effect |
| Buttons | Adds texture and interest |
| Beads | Provides sparkle and elegance |
| Patches | Gives a personalized touch |
Care Tips
Knit drawstring bags need special care to stay nice. Proper washing and storage keep them looking new.
Follow these tips to maintain your knit bag’s shape and color. Simple steps can make a big difference.
Washing And Drying
Wash your knit drawstring bag by hand in cold water. Use mild soap to avoid damage.
Do not twist or wring the bag. Gently press out excess water with a towel.
- Lay flat to dry to keep its shape
- Avoid direct sunlight to prevent fading
- Do not use a dryer as it can shrink the fibers
Storage Advice
Store your knit bag in a cool, dry place. Keep it away from sharp objects.
To prevent creases, stuff the bag with tissue paper. This helps it maintain its shape.
- Use a cotton bag for storage to allow it to breathe
- Keep away from direct sunlight to avoid color fading
- Store separately from heavier items to prevent squishing

Credit: sunflowercottagecrochet.com
Frequently Asked Questions
What Materials Are Needed To Knit A Drawstring Bag?
You need yarn, knitting needles, a tapestry needle, and a drawstring cord. Choose yarn suitable for bags like cotton or acrylic for durability.
How Do I Start Knitting A Drawstring Bag?
Begin by casting on stitches according to your bag size. Knit in the round or flat, following your pattern for the bag’s body.
How To Add A Drawstring To A Knitted Bag?
Create eyelets or holes near the bag’s opening by knitting yarn overs. Thread the drawstring cord through these holes evenly.
Can Beginners Knit A Drawstring Bag Easily?
Yes, beginners can knit a drawstring bag. Use simple stitches like garter or stockinette and follow a clear pattern.
Conclusion
Knitting a drawstring bag is a fun and useful skill. You can choose any color or yarn you like. This project helps improve your knitting techniques step by step. Carry your bag proudly or gift it to someone special. Practice makes your stitches neater and your bags stronger.
Keep trying different sizes and patterns for variety. Enjoy the process and feel proud of your handmade bag. Happy knitting!