
Looking to add a personal touch to your tote bag? Embroidering your tote bag is a simple and fun way to turn a plain accessory into something truly unique.
Whether you want to showcase your creativity or make a thoughtful gift, you’re just a few steps away from mastering this craft. In this guide, you’ll discover easy techniques and tips that anyone can follow, even if you’ve never picked up a needle before.
Ready to transform your tote bag into a stylish statement? Let’s get started!
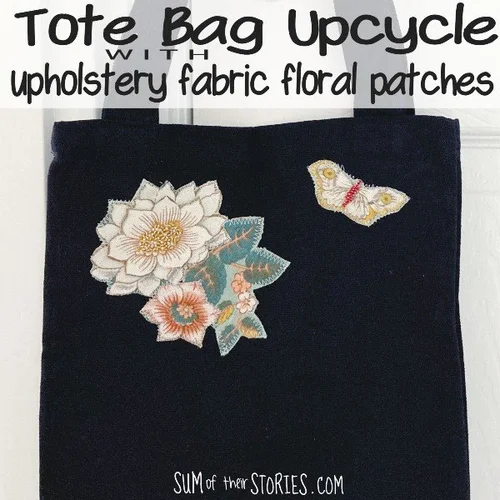
Credit: www.sumoftheirstories.com
Choosing The Right Tote Bag
Picking the perfect tote bag is key for embroidery projects. The right bag holds your design well and lasts long.
Consider fabric, size, shape, and whether the bag is new or pre-washed before you start stitching.
Fabric Types
Fabric affects how easy it is to embroider and how the design looks. Choose a fabric that supports your stitch style.
- Canvas:Thick and strong. Great for sturdy designs.
- Cotton:Soft and easy to sew. Holds colors well.
- Linen:Natural and textured. Adds a unique look.
- Polyester:Smooth but slippery. Use stabilizers for best results.
Bag Size And Shape
Size and shape decide where your embroidery fits best. Match your design size to the tote’s space.
| Bag Size | Best Design Type | Notes |
| Small (10-12 inches) | Simple and small motifs | Good for initials or small logos |
| Medium (13-15 inches) | Detailed designs | Allows more complex patterns |
| Large (16+ inches) | Large and bold images | Great for full scenes or quotes |
Pre-washed Vs New Bags
Decide if you want to use a new tote bag or one that is pre-washed. Washing affects fabric feel and size.
- New Bags:May shrink or bleed colors after washing.
- Pre-washed Bags:Already shrunk and softened. Ready for embroidery.
- Tip:Pre-washing new bags before stitching helps keep designs neat.
Gathering Embroidery Supplies
Before you start embroidering a tote bag, gather all the needed supplies. Having the right tools helps your work go smoothly.
This guide explains the main supplies you need to begin your embroidery project on a tote bag.
Needles And Threads
Choose embroidery needles that fit your fabric type. Needles come in different sizes and shapes for various threads.
Select threads made for embroidery. Cotton and polyester threads are common and strong for tote bags.
- Use sharp embroidery needles size 7 to 9 for thick fabric
- Pick colorful embroidery floss or stranded cotton threads
- Polyester threads give a shiny finish and are durable
- Avoid regular sewing thread; it can break easily
Hoops And Stabilizers
Hoops keep the fabric tight while you stitch. Choose a hoop size that fits your tote bag area.
Stabilizers support the fabric to avoid puckering. Pick one that suits your tote bag material and design.
- Wooden or plastic hoops are common choices
- Use a medium or large hoop for big designs
- Cut-away stabilizers work well for sturdy fabrics
- Water-soluble stabilizers are good for delicate fabrics
Design Transfer Tools
Use tools to transfer your embroidery design onto the tote bag. This step helps you follow the pattern accurately.
Choose a transfer method based on your fabric and design complexity.
- Water-soluble pens leave marks that wash out easily
- Carbon paper transfers designs by tracing
- Heat transfer pens use an iron to apply the design
- Light boxes help trace designs on thin fabric
Selecting Your Design
Choosing the right design is key for your tote bag embroidery. A good design fits your style and skill level.
Think about the size and colors before you start. This helps make your project easier and fun.
Simple Patterns For Beginners
Pick simple patterns with basic shapes and few colors. These are easier to stitch and look neat on fabric.
- Basic flowers like daisies or tulips
- Geometric shapes such as circles and triangles
- Simple animals like birds or fish
- Letters or initials for personalization
Using Templates And Stencils
Templates and stencils help you trace your design on the tote bag. They keep your pattern neat and even.
| Tool | Use |
| Paper Template | Draw design on paper, then trace on fabric |
| Plastic Stencil | Place on fabric and mark design edges |
| Transfer Pen | Draw directly on fabric with erasable ink |
Customizing Your Design
Make your design unique by changing colors, adding details, or mixing patterns. This shows your personality.
Try these ideas to customize:
- Change thread colors to match your style
- Combine two simple patterns into one
- Add small details like dots or lines
- Use different stitch types for texture
Preparing The Tote Bag
Embroidering a tote bag can add a personal touch. Preparing the bag correctly ensures the best results.
Follow these steps to prepare your tote bag for embroidery. Proper preparation is key to success.
Washing And Ironing
Wash the tote bag to remove any dirt or chemicals. Use a mild detergent and rinse thoroughly.
After washing, iron the bag to remove wrinkles. A smooth surface is essential for even embroidery.
Marking The Design Area
Use a fabric marker to outline the design area. Ensure it is centered and aligned properly.
Clear markings help guide your stitches. Double-check the placement before proceeding.
Securing The Fabric In A Hoop
Place the tote bag fabric in an embroidery hoop. The hoop keeps the fabric taut and prevents puckering.
Tighten the hoop securely. Check that the fabric is smooth and evenly stretched.
- Choose a hoop size that fits your design area
- Ensure the fabric is not too tight, to avoid distortion
- Adjust the hoop as needed during embroidery
Basic Embroidery Stitches
Embroidery adds a personal touch to a plain tote bag. You can use simple stitches to create beautiful designs. These stitches are easy to learn and perfect for beginners.
We will cover three basic stitches: backstitch, satin stitch, and French knots. Each stitch has a unique look and purpose in embroidery.
Backstitch
The backstitch is a strong, straight stitch. It is great for outlining shapes and creating clean lines on your tote bag.
To make a backstitch, bring the needle up through the fabric. Then go back one stitch length and bring the needle up again ahead of the first stitch.
- Start by pulling the thread through the fabric.
- Insert the needle one stitch length behind.
- Bring the needle up one stitch length ahead.
- Repeat to create a solid line.
Satin Stitch
The satin stitch fills small areas with smooth, solid color. It looks like shiny fabric sewn onto your tote bag.
Make parallel stitches close together. Keep the thread tight for a neat finish. This stitch works well for filling shapes like leaves or letters.
- Bring the needle up at one edge of the shape.
- Insert it straight across the shape.
- Keep stitches close and even.
- Fill the area completely with stitches.
French Knots
French knots add small, raised dots to your design. They create texture and detail on your tote bag.
Wrap the thread around the needle twice. Hold the thread tight and push the needle back near the starting point. Pull the thread to form a small knot.
- Pull the needle through the fabric.
- Wrap the thread two times around the needle.
- Hold the thread tight near the fabric.
- Insert the needle close to the first hole.
- Pull the thread to form a knot on the surface.
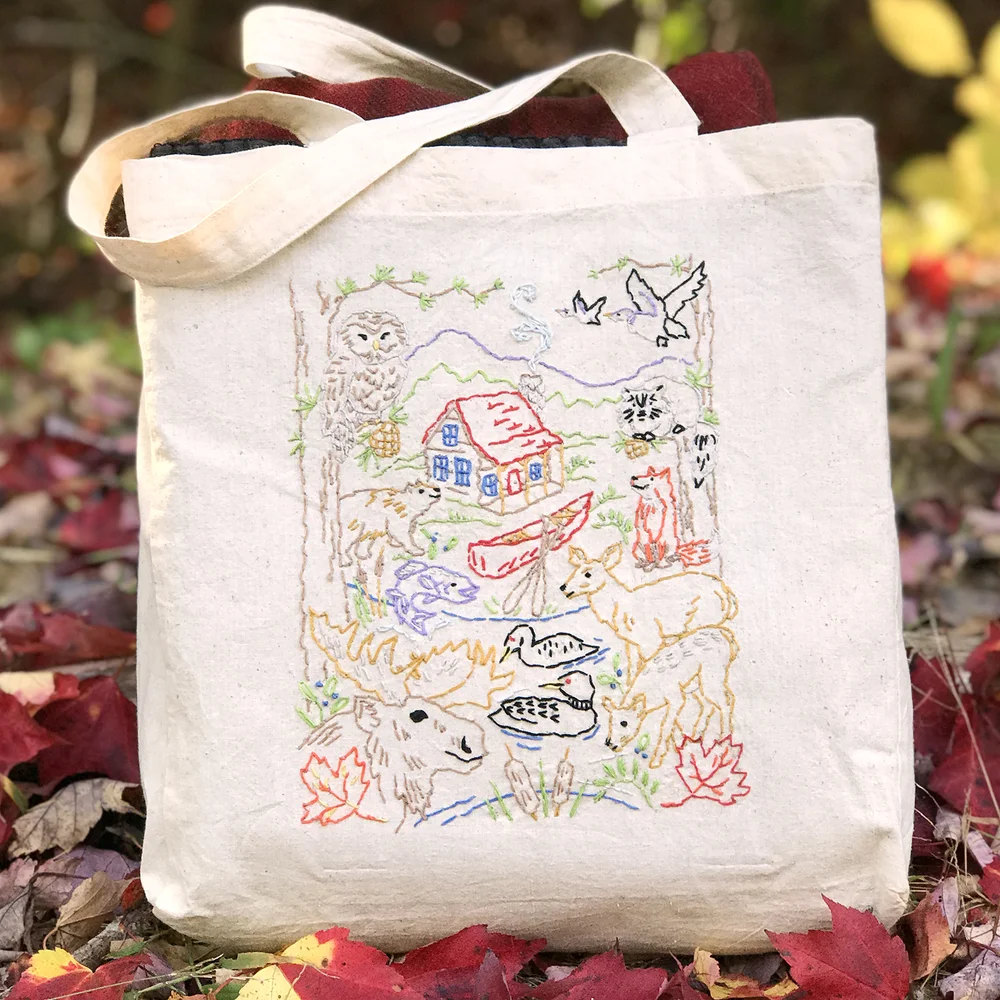
Credit: heidiboyd.com
Step-by-step Embroidery Process
Embroidering a tote bag adds a personal touch to a simple accessory. This guide walks you through the basic steps to create beautiful embroidery designs. Follow these clear steps to decorate your tote bag with ease.
Each part of the process is important to achieve neat and lasting results. You will learn how to transfer your design, stitch the outline, fill in areas, and add fine details.
Transferring The Design
Begin by choosing a design you want on your tote bag. Use a water-soluble pen or transfer paper to place the design on the fabric. Make sure the design is centered and flat. This step creates a clear guide for your embroidery stitches.
Starting With Outline Stitches
Outline stitches define the shape of your design. Use a simple stitch like the backstitch or stem stitch. Keep stitches even and close together for a clean line. This step helps your design stand out and prepares for filling the inside areas.
- Thread your needle with embroidery floss.
- Start from the back of the fabric to hide knots.
- Follow the design lines carefully.
- Keep the tension even to avoid puckering.
- Finish outlines before moving to filling stitches.
Filling The Design
Fill the inside of your design with stitches like satin stitch or long and short stitch. These stitches cover the fabric fully and add color. Choose thread colors that match your design and work slowly to keep stitches smooth.
| Stitch Type | Use | Effect |
| Satin Stitch | Fill solid shapes | Shiny and smooth surface |
| Long and Short Stitch | Fill areas with shading | Blended and textured look |
| Seed Stitch | Fill small areas | Speckled texture |
Adding Details And Texture
Add small stitches to bring your design to life. Use French knots, lazy daisy, or split stitches. These add texture and highlight important parts. Take your time to place these details carefully.
Try these tips for details:
- Use French knots for dots or flower centers.
- Lazy daisy stitches make petals or leaves.
- Split stitches create fine lines or veins.
Finishing Touches
Adding the finishing touches to your embroidered tote bag makes a big difference. These steps help secure your work and keep it looking great. Follow simple tips to complete your project with care.
Paying attention to the final details ensures your embroidery stays neat and lasts long. Let’s look at how to finish your tote bag properly.
Securing Threads
Securing threads prevents your embroidery from coming undone. Take time to tie off your threads properly. This step keeps your design safe through use and washing.
- Pull the thread to the back side of the fabric.
- Make small stitches over the loose ends.
- Tie a knot close to the fabric if possible.
- Trim excess thread carefully without cutting too close.
- Check all thread ends to avoid loose strands.
Removing Hoop And Stabilizer
After finishing the embroidery, gently remove the hoop. The stabilizer inside supports the stitches but should be removed carefully to keep the fabric smooth.
| Type of Stabilizer | Removal Method | Tip |
|---|---|---|
| Cut-away | Leave in place for support | Trim edges close to stitches |
| Water-soluble | Soak in water until it dissolves | Use lukewarm water for best results |
| Tear-away | Carefully tear away by hand | Do not pull too hard to avoid damage |
Washing And Pressing
Washing and pressing your tote bag refreshes the fabric and smooths out wrinkles. Use gentle methods to protect your embroidery and fabric.
- Hand wash the tote bag with mild soap and cold water.
- Do not wring or twist the fabric.
- Lay flat or hang to dry in shade.
- Use a pressing cloth when ironing to avoid direct heat.
- Set iron to a low temperature suitable for the fabric type.
Care Tips For Embroidered Tote Bags
Embroidered tote bags are both stylish and practical. They require special care to maintain their beauty. Here are some tips to help you care for your embroidered tote bags.
From cleaning to storing, these tips will ensure your tote bag stays in great condition.
Cleaning Instructions
Keeping your embroidered tote bag clean is important. It helps to preserve the embroidery and fabric.
- Hand wash in cold water with mild detergent
- Gently rub the embroidered area
- Rinse thoroughly and air dry
Storage Suggestions
Proper storage prevents damage to your tote bag. Follow these steps to store your bag correctly.
- Store in a cool, dry place away from sunlight
- Use a breathable fabric bag for protection
- Avoid hanging to prevent stretching
Repairing Minor Damages
Minor damages can be repaired easily. This helps to extend the life of your tote bag.
- Use a needle and thread to fix loose stitches
- Apply fabric glue to small tears
- Seek professional help for major repairs
Inspiring Project Ideas
Embroidering a tote bag lets you add a personal touch. You can choose many designs to match your style.
Here are some creative ideas to inspire your next embroidery project on a tote bag.
Floral Patterns
Floral patterns give your tote a fresh and natural look. You can use different stitches to create petals and leaves.
- Simple daisies with satin stitch petals
- Roses using French knots and lazy daisy stitches
- Vines and leaves with backstitch and stem stitch
- Wildflowers in bright colors for a cheerful design
Monograms And Letters
Monograms make your tote bag unique and personal. Choose a clear font or hand-drawn letters.
| Letter Style | Best Stitch | Effect |
| Block Letters | Satin Stitch | Bold and neat |
| Cursive Script | Split Stitch | Elegant and flowing |
| Shadowed Letters | Stem and Backstitch | 3D and deep |
Abstract And Geometric Designs
Abstract and geometric designs give a modern look to your tote. Use shapes and lines in creative ways.
Try these ideas for your embroidery:
- Triangles and diamonds in repeating patterns
- Circles and dots connected by straight lines
- Zigzag stitches in contrasting colors
- Abstract shapes with varied stitch lengths

Credit: www.youtube.com
Frequently Asked Questions
What Materials Do I Need To Embroider A Tote Bag?
You need a plain tote bag, embroidery hoop, needles, embroidery floss, scissors, and a fabric marker. These basic supplies make your project easy and fun.
How Do I Transfer Embroidery Patterns Onto A Tote Bag?
Use a water-soluble fabric marker or transfer paper to trace your pattern. Ensure the design is centered and visible on the fabric.
Can Beginners Easily Embroider A Tote Bag?
Yes, tote bags are ideal for beginners. Start with simple stitches like backstitch or satin stitch to build confidence and skills.
How Do I Secure Embroidery Floss To Prevent Unraveling?
Tie a small knot at the thread’s end or use a few backstitches. This keeps the embroidery secure and neat over time.
Conclusion
Embroidering a tote bag adds a personal touch to your item. It is fun and simple to learn. Start with basic stitches and choose your favorite design. Practice makes your work neat and beautiful. Use the right tools to make stitching easier.
Enjoy creating a unique bag that shows your style. Keep trying and you will improve quickly. This craft brings joy and a sense of pride. Grab your needle and thread, and start today.


