

Are you looking to add a special, personal touch to your baby bag? Embroidering your own design can make an ordinary bag truly unique and meaningful.
Whether you want to create a cute pattern, a name, or a heartfelt message, this guide will show you how to do it step-by-step. You don’t need to be an expert to get started—just a little patience and creativity. By the end, you’ll have a beautiful, customized baby bag that stands out and carries your love in every stitch.
Ready to make your baby bag one-of-a-kind? Let’s dive in!
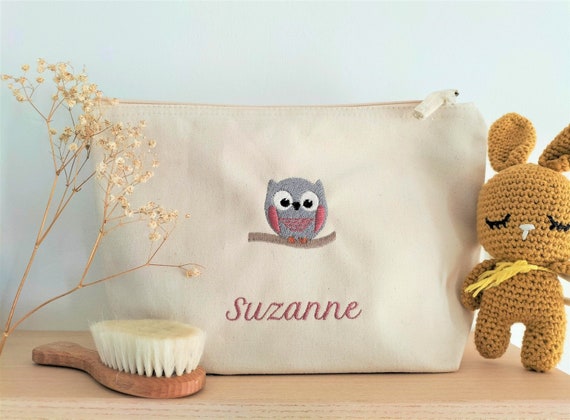
Credit: www.etsy.com
Choosing The Right Baby Bag
Choosing the right baby bag is important before you start to embroider it. The bag should be easy to work with and practical for daily use.
A good baby bag holds all needed items and looks nice after adding embroidery. Think about the material, size, and shape first.
Materials That Work Best
Pick a bag made from strong fabric that can hold stitches well. Cotton, canvas, and denim are good choices for embroidery.
These materials do not stretch too much. They keep the embroidery clear and neat. Avoid thin or slippery fabrics.
- Cotton: soft, durable, and easy to embroider
- Canvas: thick and strong for heavy use
- Denim: stylish and holds embroidery well
- Avoid nylon or polyester with shine
Size And Shape Considerations
Choose a size that fits all baby items without being too big. A medium size bag is often best for embroidery work.
The shape should have flat areas to place your embroidery design. Rounded or very small bags make stitching harder.
- Medium size fits most baby essentials
- Flat front or side panels for embroidery
- Simple shapes are easier to decorate
- Avoid very small or very bulky bags
Selecting Embroidery Designs
Choosing the right embroidery design is key to making a baby bag special. The design should be cute and suitable for babies.
Think about the baby’s age and the bag’s size. This helps pick the best pattern for your project.
Popular Baby-themed Patterns
Many embroidery designs fit well on baby bags. Some patterns are classic and loved by many.
- Animals like bears, ducks, and rabbits
- Baby items such as bottles and pacifiers
- Alphabet letters or the baby’s name
- Stars, hearts, and clouds
- Simple flowers and balloons
These patterns add charm and make the bag look playful and soft.
Customizing Your Design
Personalizing your embroidery makes the baby bag unique. You can change colors or add names.
Adjust the size of the pattern to fit the bag well. Use soft thread colors that match the bag fabric.
- Add the baby’s initials or birth date
- Use pastel colors for a gentle look
- Mix small patterns for a creative design
- Choose thread types for a smooth finish
Gathering Embroidery Supplies
Before you start embroidering a baby bag, you need to collect the right supplies. Good materials make your work easier and better.
Getting the right tools helps you create neat and beautiful embroidery designs. Let’s look at what you need.
Essential Tools And Threads
You need a few basic tools to begin embroidery. These tools help you manage your threads and fabric well.
Choosing the right thread is very important. Threads come in different colors and materials for different effects.
- Embroidery scissors to cut threads cleanly
- Thread conditioner to keep threads smooth
- Fabric markers for marking designs
- Embroidery floss in soft colors for baby bags
- Different thread materials like cotton and silk
Hoops And Needles
Hoops hold the fabric tight while you work. They keep the fabric steady and help you stitch evenly.
Needles come in many sizes and types. Choose the right needle to match your thread and fabric thickness.
- Wooden or plastic embroidery hoops, size 4 to 6 inches
- Sharp embroidery needles with a large eye for floss
- Tapestry needles for thicker threads
- Needle threader to help thread the needle easily
Preparing The Bag For Embroidery
Before starting embroidery, you must prepare the baby bag properly. Good preparation helps your design look neat and last longer.
This guide explains how to clean, mark, and stabilize the bag for embroidery.
Cleaning And Marking The Fabric
Start by cleaning the fabric to remove dirt and oils. This helps the embroidery thread stick well.
Next, mark the design area lightly with a fabric pencil or washable marker. This shows where to stitch.
- Use mild soap and water for cleaning
- Let the bag dry completely
- Choose a light, erasable marking tool
- Mark the center and outline of the design
Stabilizing The Bag
Stabilizing supports the fabric and stops it from stretching. It keeps the stitches even and tight.
Use the right stabilizer type based on the bag’s fabric and design size.
- Choose tear-away stabilizer for light fabrics
- Use cut-away stabilizer for stretchy or thick fabrics
- Attach stabilizer to the inside of the bag
- Hoop the bag and stabilizer together carefully
Basic Embroidery Stitches To Use
Embroidery can add a special touch to a baby bag. You can use simple stitches to create pretty designs. These stitches are easy to learn and work well on soft fabrics.
Below are three basic embroidery stitches. Each one offers a different look and texture. Try them to decorate your baby bag beautifully.
Running Stitch
The running stitch is the simplest embroidery stitch. It looks like small, even dashes on the fabric. Use it for outlines or simple patterns. It is quick and easy to do.
Backstitch
Backstitch creates a solid line that is stronger than a running stitch. It is great for details and outlines. This stitch helps make your design clear and neat.
- Bring the needle up through the fabric.
- Take one small stitch backward.
- Bring the needle up ahead of the previous stitch.
- Repeat to form a continuous line.
Satin Stitch
Satin stitch fills an area with smooth, flat stitches. It is perfect for filling shapes like leaves or letters. Use this stitch to add bold color and texture.
| Step | Description |
| 1 | Bring the needle up at one edge of the shape. |
| 2 | Take the needle down directly across the shape. |
| 3 | Bring the needle up next to the first stitch. |
| 4 | Repeat stitching closely to cover the shape fully. |

Credit: www.youtube.com
Step-by-step Embroidery Process
Embroidery can make a baby bag special. With some simple steps, you can create a unique design.
Let’s explore how to embroider a baby bag with ease and creativity.
Transferring The Design
Begin by selecting a design you like. Transfer it to the fabric using tracing paper or a fabric pen.
- Choose a simple design for beginners.
- Ensure the design fits the bag’s size.
- Use a lightbox to trace more accurately.
Starting Your Stitching
Thread your needle and tie a knot at the end. Begin stitching along the design lines.
Common stitches include:
- Backstitch
- Running stitch
- French knot
Finishing Touches
After completing the design, secure the thread on the back of the fabric. Cut any loose ends carefully.
| Task | Tool Needed |
| Cut loose threads | Embroidery scissors |
| Press fabric | Iron |
| Seal design | Fabric glue |
Caring For Your Embroidered Baby Bag
Your embroidered baby bag needs special care. Proper maintenance keeps it looking new.
Following these tips will help your bag last longer and stay beautiful.
Washing Tips
Wash your embroidered baby bag carefully to avoid damage. Gentle cleaning preserves its colors and fabric.
- Use cold water for washing.
- Select a gentle detergent.
- Hand wash for delicate care.
- Air dry to prevent shrinkage.
Storage Advice
Proper storage of your baby bag is important. This helps maintain its shape and prevents wear.
- Keep in a cool, dry place.
- Use a dust cover for protection.
- Do not overload with heavy items.

Credit: www.youtube.com
Frequently Asked Questions
What Materials Are Needed To Embroider A Baby Bag?
To embroider a baby bag, you need embroidery floss, needles, a hoop, fabric markers, and the baby bag itself. Choose soft, washable materials safe for babies. Prepare your design and gather tools for a smooth embroidery process.
How Do I Choose The Right Embroidery Design?
Select simple, cute, and baby-friendly designs like animals, initials, or stars. Ensure the design size fits the baby bag area. Use patterns that are easy to stitch and won’t irritate the baby’s skin.
Can Beginners Embroider A Baby Bag Easily?
Yes, beginners can embroider a baby bag with basic stitches like backstitch or satin stitch. Start with small, simple designs and practice on fabric scraps before working on the bag. Patience and practice improve results.
How To Care For An Embroidered Baby Bag?
Hand wash the embroidered baby bag gently in cold water using mild detergent. Avoid harsh rubbing to protect stitches. Air dry flat away from direct sunlight to maintain embroidery quality and fabric softness.
Conclusion
Embroidering a baby bag adds a personal and charming touch. It takes patience but brings great joy. Start with simple designs and practice stitches often. Choose colors that match the bag and baby’s style. Enjoy the process, and don’t rush your work.
Handmade embroidery makes the bag unique and special. Your baby will cherish it for years. Keep trying, and your skills will improve quickly. Embroidery turns an ordinary bag into a lovely keepsake. Give it a go, and see your creation come alive.


