
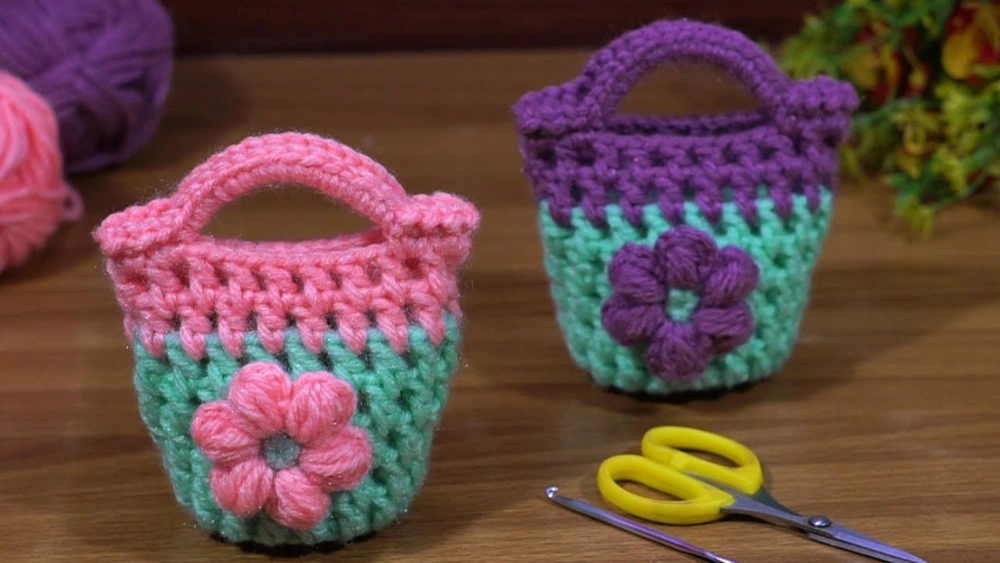
Are you looking for a fun and creative way to make a special gift for your child? Learning how to crochet a child’s bag is easier than you think, and you don’t need to be an expert to start.
Imagine your little one carrying a unique, handmade bag that shows your love and care. In this guide, you’ll discover simple steps and useful tips that will help you create a beautiful, durable bag perfect for your child. Ready to turn yarn into something amazing?
Let’s get started!
Materials Needed
Making a child’s bag with crochet is fun and creative. Gathering the right materials helps you start smoothly.
Here are the main materials you need to make a simple and pretty bag for a child.
Yarn Selection
Choose yarn that is soft and easy to wash. Kids need bags that feel good and last long.
Acrylic yarn is a good choice because it is colorful and strong. Cotton yarn is also nice because it is soft and breathable.
- Use medium weight yarn (worsted weight) for good size and durability
- Pick bright or pastel colors that children like
- Avoid scratchy or delicate yarn
Hook Size
Select a crochet hook that matches your yarn weight. This helps your stitches look neat and even.
For medium weight yarn, a 5 mm (H-8) hook is usually perfect. Using the right hook size makes the bag sturdy.
- Check the yarn label for recommended hook size
- Use a hook that feels comfortable in your hand
- A smaller hook makes a tighter fabric, bigger hook makes a softer fabric
Additional Supplies
You need a few more tools to finish the child’s bag well. These help with shaping and decorating the bag.
- Scissors for cutting yarn
- Tapestry needle to weave in ends and sew parts
- Measuring tape to check bag size
- Buttons, zippers, or patches for decoration (optional)
- Stitch markers to keep track of rounds or stitches
Choosing A Design
Choosing the right design is key to making a child’s bag fun and useful. The design should be simple to crochet and appealing to kids.
Think about the child’s interests and what shapes or themes will catch their eye. This helps create a bag they will love to use.
Simple Shapes
Simple shapes make crochet easier and faster. You can use basic forms to build a cute bag with less effort.
- Squares and rectangles for classic bags
- Circles for small pouches or coin bags
- Triangles for fun and unique styles
- Hearts or stars for playful designs
Popular Themes
Choosing a theme helps make the bag special. Kids enjoy bags that show their favorite things or characters.
| Theme | Description |
| Animals | Bags shaped like cats, dogs, or owls |
| Nature | Flowers, trees, or fruits |
| Fantasy | Unicorns, dragons, or fairies |
| Vehicles | Cars, boats, or airplanes |
Basic Crochet Stitches
Learning a few basic crochet stitches helps you create fun projects. These stitches build the foundation for making a child’s bag. You can use simple yarn and a hook to start.
We will explore three main stitches: chain stitch, single crochet, and double crochet. Each stitch has a unique look and use. Practice these to gain confidence in your crochet skills.
Chain Stitch
The chain stitch is the first stitch to learn in crochet. It creates a foundation row to build on. You make a loop, yarn over, and pull through to form a chain.
- Make a slip knot on your hook
- Yarn over the hook
- Pull the yarn through the loop on the hook
- Repeat for the number of chains you need
Single Crochet
Single crochet creates a tight, dense fabric. It is good for the bag’s base and sides. It uses one loop on the hook at a time.
| Step | Action |
| 1 | Insert hook into the second chain from hook |
| 2 | Yarn over and pull through (two loops on hook) |
| 3 | Yarn over again and pull through both loops |
| 4 | Repeat across the row |
Double Crochet
Double crochet stitches make a taller and looser fabric. This stitch is useful for the bag’s decorative parts. It uses yarn overs before inserting the hook.
To make a double crochet stitch:
- Yarn over the hook once
- Insert hook into the stitch
- Yarn over and pull through (three loops on hook)
- Yarn over and pull through two loops
- Yarn over and pull through the last two loops
- Repeat for the row

Credit: www.youtube.com
Starting The Base
Beginning your child’s bag with a strong base is important. The base holds the shape and supports the bag’s weight.
This guide covers how to make the base using two key techniques. First, you will create a foundation chain. Then, you will work in the round.
Creating A Foundation Chain
The foundation chain is the first row of stitches. It sets the width of the bag’s base. Use a medium-weight yarn and matching hook.
- Start with a slip knot on your hook.
- Yarn over and pull through to make a chain stitch.
- Repeat until the chain reaches your desired base width.
- Keep the chain loose but even for flexibility.
- Count stitches to ensure the base is symmetrical.
Working In The Round
Working in the round means crocheting in circles. This method shapes the base evenly and makes the bag sturdy.
| Round | Action | Description |
| 1 | Join chain ends | Connect last chain to first with a slip stitch to form a circle. |
| 2 | Single crochet | Crochet one single crochet in each chain stitch around. |
| 3 | Increase stitches | Add two single crochets in certain stitches to widen the base. |
| 4 and beyond | Continue rounds | Keep crocheting in rounds, increasing as needed for size. |
Building The Bag Body
Creating the body of a child’s crochet bag requires careful shaping. You will use techniques to add or remove stitches. This helps the bag keep a good form as you work.
Pay attention to the size and shape while crocheting. This will make the bag look neat and last longer during use.
Increasing And Decreasing
Increase stitches to widen the bag. Decrease stitches to narrow it. This controls the overall shape and size. Use these simple methods:
- Increasing:Add two stitches in one stitch to make the row wider.
- Decreasing:Crochet two stitches together to reduce width.
- Even spacing:Space increases and decreases evenly for smooth curves.
Maintaining Shape
Keeping the bag’s shape means checking your stitch tension and pattern. Uneven stitches can make the bag look misshapen.
| Tip | How to Do It |
|---|---|
| Check tension | Keep yarn tight but not too tight. |
| Follow pattern | Count stitches regularly to avoid mistakes. |
| Use markers | Place stitch markers at increase and decrease points. |
| Block the bag | Wet and shape the bag after finishing to smooth edges. |

Credit: www.youtube.com
Adding The Strap
Adding a strap to your child’s crochet bag is a simple task. It makes the bag easy to carry.
In this guide, you will learn how to determine the right length and attach it securely.
Determining Length
The length of the strap is important for comfort and style. Measure carefully for the best fit.
Here is a simple method to determine the strap length:
- Measure from the child’s shoulder to their hip.
- Add a few inches for flexibility.
- Cut the yarn to this length.
Attaching Securely
Attaching the strap securely ensures the bag is strong and durable. Follow these steps to attach it right.
| Step | Action |
| 1 | Use a crochet hook to loop the strap to the bag’s edge. |
| 2 | Secure each end with a tight knot. |
| 3 | Double-check that the knots are firm. |
Finishing Touches
Finishing your crochet child’s bag can be fun and creative. This is where you can add unique details.
These touches not only enhance the look but also add function to the bag. Let’s explore some ideas.
Adding Buttons Or Closures
Buttons or closures help keep items secure in the bag. They are practical and stylish.
Select buttons that are easy for children to use. Velcro is also a good choice for little hands.
- Choose colorful buttons for a playful look
- Magnetic snaps are simple and effective
- Velcro is gentle and easy to fasten
Embellishments And Decorations
Decorating the bag makes it special. You can add embellishments to personalize it.
Use different materials to create fun designs. This can include patches, beads, or fabric paint.
| Decoration | Purpose |
| Patches | Adds character |
| Beads | Gives texture |
| Fabric paint | Custom designs |
Care And Maintenance
Crocheted child’s bags need proper care to last long. Cleaning and storing them right keeps the bag looking good.
Following simple steps helps maintain the bag’s shape and colors. Learn how to wash and store your crochet bag safely.
Washing Instructions
Always wash your crochet bag gently to avoid damage. Use mild soap and cold water. Avoid rough scrubbing or twisting the bag.
- Hand wash only; do not use washing machines.
- Soak the bag in cold water with mild detergent for 10 minutes.
- Gently squeeze out water without wringing the fabric.
- Rinse with clean cold water until all soap is gone.
- Lay flat on a towel to dry, reshaping if needed.
Storage Tips
Store your crochet bag in a dry, cool place. Keep it away from direct sunlight and moisture to prevent fading and mildew.
| Storage Method | Why It Helps |
| Keep bag in a breathable cotton bag | Prevents dust and allows air circulation |
| Stuff bag with tissue paper | Maintains shape and avoids creases |
| Do not hang bag by handles | Prevents stretching and distortion |
| Store away from sunlight | Prevents color fading |
Credit: www.youtube.com
Frequently Asked Questions
What Materials Do I Need To Crochet A Child’s Bag?
You need yarn, a crochet hook, scissors, and a yarn needle. Choose soft, durable yarn suitable for children. Optional materials include buttons or appliques for decoration. These basics ensure your bag is both functional and appealing.
How Long Does It Take To Crochet A Child’s Bag?
Crocheting a child’s bag typically takes 3 to 6 hours. The time varies based on your skill level and the bag’s complexity. Simple patterns are quicker, while detailed designs require more time.
Which Crochet Stitch Is Best For A Child’s Bag?
Single crochet stitch is best for a child’s bag. It creates a tight, sturdy fabric that holds shape well. This stitch is also easy for beginners and provides a neat finish.
Can I Customize The Size Of The Child’s Bag?
Yes, you can customize the bag size by adjusting stitch count and rows. Use a measuring tape to ensure the bag fits your child’s needs. Personalizing size makes the bag practical and unique.
Conclusion
Crocheting a child’s bag is fun and rewarding. You can choose colors and designs freely. Each stitch brings you closer to a unique gift. This project helps improve your crochet skills step by step. Keep practicing to make more creative bags.
Enjoy the process and feel proud of your work. Sharing your handmade bag will bring joy to any child. Start your crochet journey today and see the results!


