
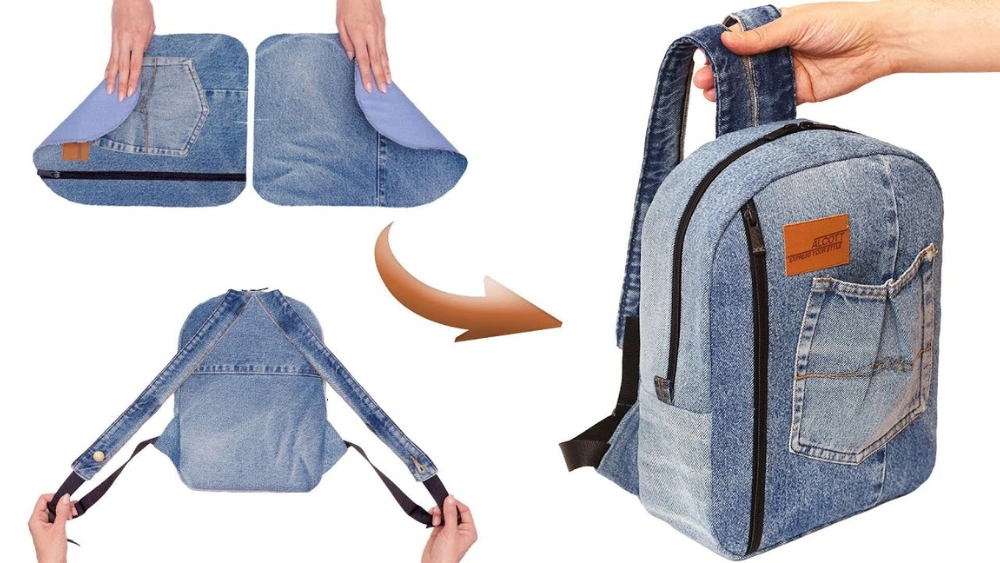
Have you ever wished you could create a backpack that fits your style and needs perfectly? Imagine carrying a bag made entirely by your own hands—designed exactly the way you want it.
Making a backpack from scratch might sound tricky, but with the right steps, you can do it yourself. This guide will walk you through the process, helping you turn simple materials into a sturdy, unique backpack. Ready to start crafting something truly your own?
Let’s dive in and make your dream backpack a reality.
Materials And Tools Needed
Making a backpack from scratch needs the right materials and tools. Choosing good supplies helps your project last longer.
This guide covers what fabric to pick, the sewing tools required, and extra items to prepare before you start.
Choosing The Right Fabric
Select a fabric that is strong and water-resistant. Canvas, nylon, and polyester are popular choices. Think about how you will use the backpack.
- Canvas: durable and easy to sew
- Nylon: lightweight and water-resistant
- Polyester: strong and holds color well
- Ripstop fabric: prevents tears from spreading
- Leather (optional): adds style and strength
Essential Sewing Tools
| Tool | Purpose |
|---|---|
| Sewing machine | Speeds up stitching and makes strong seams |
| Heavy-duty needles | Handles thick fabric without breaking |
| Thread | Use strong polyester or nylon thread |
| Scissors | Cut fabric cleanly and accurately |
| Measuring tape | Measure fabric and ensure correct size |
| Pins and clips | Hold fabric pieces together while sewing |
| Seam ripper | Remove mistakes without damaging fabric |
Additional Supplies
You will need some extra items to complete your backpack. These help with function and style.
- Zippers: for pockets and main closure
- Webbing straps: for shoulder straps and handles
- Buckles and adjusters: to change strap length
- Foam padding: for comfort in straps and back
- Interfacing: adds stiffness to parts of the bag
- Fabric glue or seam tape: for extra seam strength

Credit: www.youtube.com
Planning Your Backpack Design
Making a backpack from scratch starts with a clear plan. Planning helps you create a bag that fits your needs and style.
This guide covers how to pick a style, decide size, and sketch your design before you begin sewing.
Selecting A Style
Choose a backpack style that matches your daily use. Different styles offer different features and looks.
- Daypack: Small and light, good for short trips or school.
- Hiking backpack: Larger with extra pockets and support.
- Roll-top: Adjustable size with a roll closure for weather protection.
- Frame pack: Has a built-in frame for heavy loads.
Determining Size And Capacity
Think about what you will carry in your backpack. Size affects comfort and usefulness.
| Type | Capacity (Liters) | Best For |
| Small | 10-20 | Daily essentials, light loads |
| Medium | 20-40 | School, work, short trips |
| Large | 40-70 | Hiking, camping, heavy gear |
| Extra Large | 70+ | Extended trips, heavy loads |
Sketching Your Design
Draw your backpack on paper or digitally. Sketch main parts and details like pockets and straps.
Use this checklist when sketching:
- Front, side, and back views
- Placement of zippers and pockets
- Type of straps and closures
- Material ideas and colors
Creating A Pattern
Making a backpack starts with creating a pattern. This pattern guides you when cutting and sewing the fabric.
A clear pattern ensures all parts fit well and the backpack looks good.
Measuring And Drafting
First, measure the size you want for your backpack. Think about height, width, and depth.
Use these measurements to draw the shapes on paper. This drawing is your pattern draft.
- Measure the back panel height and width
- Measure the front panel, often same as back
- Measure the side panels for depth
- Include straps and pocket sizes
- Add extra space for seams (usually 1/2 inch)
Cutting The Pattern Pieces
Place your paper pattern on fabric carefully. Pin it to avoid moving.
Cut along the edges of the pattern. Cut each piece exactly for a good fit.
- Use sharp fabric scissors for clean cuts
- Cut all pieces needed: front, back, sides, straps, pockets
- Mark any important points on the fabric with chalk
- Keep pattern pieces for future use
Cutting Fabric Pieces
Cutting fabric pieces is a key step in making a backpack. Accurate cuts ensure all parts fit well.
Take your time to cut carefully. This helps avoid mistakes later in sewing.
Marking Fabric
Mark fabric before cutting. Use chalk, fabric pens, or pencils for clear lines.
Trace your pattern pieces on the fabric. Mark seam allowances and any special details.
- Place fabric flat on a clean surface
- Pin patterns to fabric to keep them still
- Draw lines carefully along the edges
- Mark important points like pockets or zippers
Tips For Precise Cutting
Use sharp scissors or a rotary cutter for clean edges. Dull tools cause jagged cuts.
Cut slowly and follow your markings exactly. Keep the fabric flat to avoid uneven pieces.
- Cut on a large, flat surface
- Hold fabric firmly but do not stretch it
- Use weights or pins to hold fabric steady
- Check your markings before cutting
- Cut one piece at a time for accuracy
Sewing The Main Body
Creating a backpack from scratch is a fun project. You will need some fabric, a sewing machine, and basic sewing skills.
The main body of the backpack is the largest part. This part needs careful assembly and strong seams.
Assembling Panels
First, cut your fabric into panels. You will need a front, back, and two side panels.
Sew the edges of these panels together. Make sure they align correctly to form the main shape of the backpack.
- Align the front and back panels with the side panels.
- Pin the panels together before sewing.
- Sew along the edges with a straight stitch.
- Trim any excess fabric for a neat finish.
Reinforcing Seams
Reinforce the seams for durability. This will ensure your backpack can carry heavy items without tearing.
Use a zigzag stitch for extra strength. Go over each seam twice to make it sturdier.
| Seam Type | Strength Level |
|---|---|
| Straight Stitch | Medium |
| Zigzag Stitch | High |
Adding Pockets And Compartments
Pockets and compartments make backpacks more useful. They help organize items and keep things easy to find.
Adding them takes planning and careful sewing. You can create different pockets for different needs.
Designing Functional Pockets
Think about what you want to carry in each pocket. Design pockets to hold items securely and fit their size.
Use strong fabric for pockets that hold heavy or sharp objects. Consider adding elastic bands or mesh for flexibility.
- Keep pockets easy to reach
- Make some pockets small for keys or pens
- Add larger compartments for books or clothes
- Use different shapes to save space
Attaching Zippers And Flaps
Zippers keep pockets closed and items safe. Sew zippers straight and secure for smooth use.
Flaps add extra protection from rain and dust. Attach flaps with Velcro, snaps, or buttons for easy access.
- Place zippers where you can easily open them
- Choose zipper size based on pocket size
- Make sure flaps cover pockets fully
- Reinforce seams around zippers and flaps
Installing Straps And Handles
Adding straps and handles is key to making your backpack usable. They let you carry the bag comfortably.
Good straps and handles make the backpack strong and easy to use every day.
Choosing Strap Materials
Select materials that are tough and comfortable for your backpack straps. This helps the bag last longer.
Common strap materials include nylon, polyester, and cotton webbing. Each has its own benefits.
- Nylon:Strong and durable, resists wear and water
- Polyester:Holds color well and is water-resistant
- Cotton webbing:Soft and comfortable but less water-resistant
- Leather:Stylish and durable but can be heavy
Adjustable Strap Techniques
Adjustable straps let users change the length to fit their body. This adds comfort and flexibility.
Use sliders or buckles to make straps adjustable. Sew the parts tightly for safety.
- Sew one end of the strap to the backpack securely
- Attach a slider or buckle on the strap
- Thread the strap through the slider or buckle
- Make sure the strap moves smoothly but holds tight when pulled

Credit: m.youtube.com
Finishing Touches
After sewing the main parts of your backpack, it is time to add the finishing touches. These steps improve the bag’s look and function.
Finishing touches include adding lining, waterproofing, and checking the quality. These steps make the backpack more durable and useful.
Adding Lining
Lining gives the backpack a neat inside look. It also protects the outer fabric and helps keep the shape.
Choose a smooth fabric like nylon or cotton for the lining. Cut it to fit the backpack’s inside and sew it carefully.
- Cut lining pieces slightly smaller than the outer fabric
- Sew lining pieces together first
- Attach lining to the backpack edges with neat stitching
- Make sure pockets and compartments have lining too
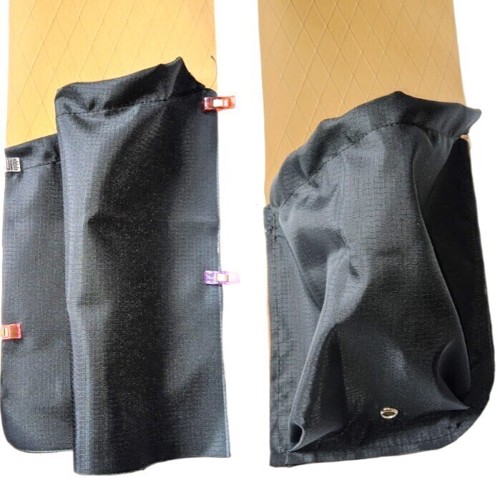
Waterproofing Options
Waterproofing protects the backpack from rain and spills. It helps keep your belongings dry.
You can use waterproof sprays or seal the seams with special tape. Some fabrics are already water-resistant.
- Spray a waterproof coat evenly on the backpack surface
- Use seam tape inside to block water from seams
- Choose waterproof zippers for extra protection
- Let the backpack dry fully before use
Final Quality Checks
Before finishing, check all parts of the backpack. Look for loose threads, weak seams, or missing stitches.
Test the straps and zippers to make sure they work well and are strong.
- Inspect all seams for gaps or loose stitches
- Pull the straps to test their strength
- Open and close all zippers several times
- Check the lining for any holes or tears
- Trim any excess threads for a clean look
Care And Maintenance Tips
Taking care of your backpack is important. It helps it last longer and look good.
Regular maintenance can prevent damage. It also makes sure your backpack is ready for the next adventure.
Cleaning Your Backpack
Keeping your backpack clean is easy. Regular cleaning stops dirt buildup and keeps it smelling fresh.
- Empty all pockets completely before cleaning
- Use a soft brush to remove surface dirt
- Wash with mild soap and water
- Let it air dry in a shaded area
Repairing Common Issues
Small repairs can keep your backpack in top shape. Address issues as they arise to avoid bigger problems.
Common repairs include fixing zippers and patching small holes. Use strong thread and a needle for tears.
| Problem | Solution |
| Broken zipper | Replace with a new one |
| Loose strap | Sew it back securely |
| Small hole | Patch with fabric |
Credit: www.myogtutorials.com
Frequently Asked Questions
What Materials Do I Need To Make A Backpack From Scratch?
You need durable fabric, heavy-duty thread, zippers, buckles, and padding. Choose materials like canvas or nylon for strength. Also, gather sewing tools such as needles, scissors, and a sewing machine for efficient construction.
How Do I Create A Backpack Pattern At Home?
Measure your desired backpack size and sketch the design on paper. Include sections for pockets, straps, and main compartments. Use rulers and templates for accuracy. This pattern guides your cutting and sewing process.
What Sewing Techniques Work Best For Backpack Making?
Use strong stitches like backstitch and double stitching. Reinforce stress points such as strap attachments and zippers. These techniques ensure durability and longevity in your handmade backpack.
How Can I Add Adjustable Straps To My Backpack?
Attach straps with buckles and sliders for length adjustment. Sew them securely to distribute weight evenly. Adjustable straps improve comfort and fit for various body sizes.
Conclusion
Making a backpack from scratch is a fun and useful skill. You choose the materials and design it your way. Each step builds your confidence and creativity. The process teaches patience and attention to detail. You end up with a unique backpack made by your own hands.
Try it, and enjoy the satisfaction of a job well done. Keep practicing to improve your sewing and crafting skills. Your handmade backpack will always have a special meaning.


