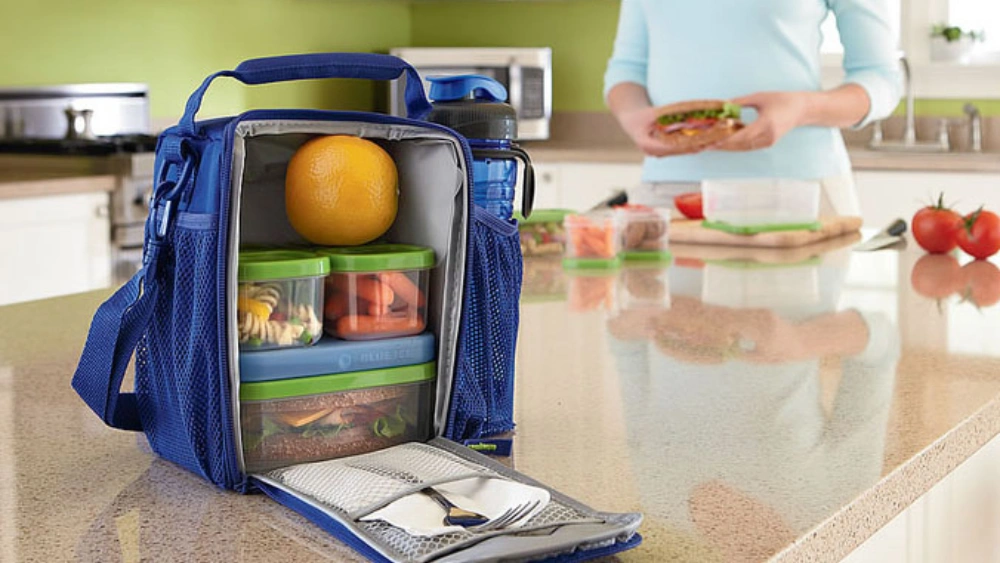
Are you tired of using plastic bags that tear or spill your lunch? Imagine having a sturdy, stylish lunch box bag that fits your needs perfectly.
Sewing your own lunch box bag is easier than you think, and you’ll save money while customizing every detail. In this guide, you’ll discover simple steps to create a bag that keeps your food fresh and looks great. Ready to make your lunchtime better?
Let’s get started!

Credit: www.youtube.com
Materials Needed
Sewing a lunch box bag is a fun project. You need the right materials to make a strong and useful bag.
This guide covers the main materials you will need to sew a lunch box bag at home.
Fabric Choices
Choose fabrics that are strong and easy to clean. Lunch bags need to keep food fresh and stay durable.
Look for fabrics that can handle spills and wear from daily use.
- Cotton canvas: sturdy and washable
- Oilcloth: water-resistant and easy to wipe
- Faux leather: durable and stylish
- Insulated fabric: keeps food cool or warm
- Fleece or batting: for padding inside
Sewing Tools
You need basic sewing tools to make the lunch box bag. These tools help you cut and stitch the fabric accurately.
Having the right tools makes sewing easier and faster.
- Sewing machine: for fast and strong seams
- Scissors or rotary cutter: to cut fabric
- Measuring tape or ruler: for precise measurements
- Pins or clips: to hold fabric pieces together
- Seam ripper: to fix mistakes
- Iron and ironing board: to press seams flat
Additional Supplies
Extra supplies help finish the lunch box bag and add useful features. These items improve the bag’s function and look.
Gather all extra materials before you start sewing.
- Zippers or Velcro: to close the bag securely
- Thread: strong polyester thread matches fabric color
- Interfacing: adds stiffness and shape
- Batting or foam: for padding and insulation
- Bias tape or binding: to finish edges neatly
- Fabric marker or chalk: to mark cutting lines

Credit: www.youtube.com
Preparing The Fabric
Preparing the fabric is an important step for sewing a lunch box bag. It helps ensure the bag is strong and looks neat.
Take your time to get the fabric ready before you start sewing. This makes the process easier and the final bag better.
Measuring And Cutting
Measure the fabric pieces you need carefully. Use a ruler or measuring tape to get exact sizes.
Cut the fabric with sharp scissors or a rotary cutter. Make straight cuts to keep edges even.
- Use a flat surface for measuring and cutting
- Double-check measurements before cutting
- Cut slowly to avoid mistakes
- Keep fabric flat to prevent wrinkles
Marking Seam Allowances
Mark the seam allowance on your fabric pieces. This shows where you will sew and helps with accuracy.
Use a fabric marker, chalk, or pencil that can be removed easily after sewing.
- Common seam allowance is 1/4 to 1/2 inch
- Mark all edges where you will sew
- Check marks before starting to sew
- Keep marks clear but light
Sewing The Main Bag
Sewing the main bag is the key part of making your lunch box bag. This part holds everything together.
We will focus on creating the bag body and adding the lining. Both steps build the bag’s structure and finish.
Creating The Bag Body
First, cut the fabric pieces for the outer bag. Make sure the fabric is strong and washable.
- Cut two main outer fabric pieces according to the pattern size.
- Pin the right sides of the fabric together.
- Sew along the edges, leaving the top open for later.
- Press seams open with an iron for a smooth finish.
- Topstitch near the seams for extra strength and style.
Adding The Lining
The lining keeps the inside neat and protects the bag’s shape. Use a lightweight but sturdy fabric.
| Step | Action |
|---|---|
| 1 | Cut two lining fabric pieces the same size as the outer pieces. |
| 2 | Pin right sides together and sew the edges, leaving the top open. |
| 3 | Place the lining inside the bag body, with wrong sides facing each other. |
| 4 | Pin the top edges of the lining and outer bag together. |
| 5 | Sew around the top edge to join the lining and outer fabric. |
Adding Insulation
Adding insulation to your lunch box bag keeps food fresh and warm. It helps protect food from outside temperatures.
Insulation adds thickness and softness to the bag. It also makes the bag sturdier and more comfortable to carry.
Choosing Insulation Materials
Pick insulation that is safe for food and easy to sew. Some materials work better for heat retention than others.
Look for materials that are lightweight but strong. They should keep cold or hot foods at the right temperature.
- Foam sheets: soft and thick, great for heat
- Reflective foil: blocks heat from escaping
- Thermal batting: thin but effective
- Neoprene: stretchy and waterproof
- Insulated fabric: combines fabric and foam
Inserting Insulation Layers
Cut the insulation to fit inside your bag pieces. Make sure it matches the size of the fabric panels.
Place the insulation between the outer fabric and lining. Pin or baste layers to hold them before sewing.
- Sew around the edges to keep insulation in place
- Use a sewing machine for strong seams
- Check for wrinkles or folds in the insulation
- Add extra insulation on the bottom for protection
- Finish all seams to prevent insulation from shifting
Constructing The Closure
The closure keeps your lunch box bag closed and secure. It stops food from falling out.
You can use zippers, Velcro, or snaps to make a strong closure. Each option fits different styles.
Installing Zippers
Zippers give a tight and neat closure. They work well for bags that open wide.
Choose a zipper the same length as your bag’s opening. Use a zipper foot on your sewing machine.
- Pin the zipper to the bag edges with the zipper teeth facing fabric.
- Sew slowly along the zipper edge, keeping stitches close to the teeth.
- Press the zipper to lay flat after sewing.
- Test the zipper by opening and closing it smoothly.
Attaching Velcro Or Snaps
Velcro and snaps offer quick closure options. They are easy to use and adjust.
Velcro is soft and flexible, while snaps give a firmer hold. Both can be sewn by hand or machine.
- Cut Velcro strips to fit the bag opening size.
- Sew one side on the bag’s front flap and the other on the bag body.
- For snaps, mark where each snap will go on both pieces of fabric.
- Use a snap tool or pliers to attach snaps securely.
- Check that Velcro or snaps close easily and hold well.
Making The Handle
Creating a handle for your lunch box bag is simple. It involves cutting fabric strips and sewing them into sturdy handles.
Handles make it easier to carry your lunch box. Let’s learn how to make them.
Cutting And Sewing Straps
Start by cutting two long fabric strips. These will become your bag’s handles.
Sew along the edges of each strip. This will strengthen the straps and prevent fraying.
- Cut strips to desired length and width
- Fold each strip in half lengthwise
- Sew along the open edge of the strips
Attaching Handles To The Bag
Position the straps on the top sides of the bag. Ensure they are evenly spaced.
Sew the ends of each strap securely to the bag. Double stitching will make them strong.
| Measure and mark strap positions | Ensure even spacing |
| Sew strap ends to bag | Double stitch for strength |
Finishing Touches
Completing your lunch box bag requires attention to detail. Finishing touches ensure durability and style.
These final steps make your handmade bag stand out. Let’s focus on topstitching and decorations.
Topstitching For Durability
Topstitching strengthens the seams and adds a polished look. It helps the bag hold its shape.
Use a matching or contrasting thread. Stitch close to the edge for the best effect.
- Choose a strong thread
- Use a longer stitch length
- Maintain even spacing
Adding Decorative Elements
Decorative elements make your bag unique. Consider adding patches or embroidery.
Be creative with your designs. Personal touches show your style and flair.
- Iron-on patches for quick decoration
- Embroidery for personalized designs
- Buttons or beads for added texture
Care And Maintenance Tips
Proper care helps your lunch box bag last longer. Follow simple steps to keep it clean and fresh.
Regular cleaning and smart storage prevent damage. These tips will protect your bag’s fabric and shape.
Washing Instructions
Wash your lunch box bag gently to avoid wear and tear. Hand washing is usually best.
- Use mild detergent and cold water for cleaning.
- Spot clean stains with a soft cloth or sponge.
- Do not bleach or use harsh chemicals.
- Rinse thoroughly to remove soap residue.
- Air dry the bag in a shaded area.
- Avoid machine washing unless the label says it is safe.
Storage Suggestions
Store your lunch box bag in a clean, dry place. Avoid folding it to keep its shape intact.
| Storage Tip | Reason |
| Keep away from direct sunlight | Prevents fabric colors from fading |
| Store upright or hang by handles | Maintains the bag’s shape |
| Ensure the bag is dry before storing | Stops mold and bad odors |
| Use a dust cover or cloth bag | Protects from dust and dirt |

Credit: www.youtube.com
Frequently Asked Questions
What Materials Are Needed To Sew A Lunch Box Bag?
To sew a lunch box bag, you need fabric, insulation material, lining, zipper, and thread. Choose waterproof fabric for durability. Insulation keeps food fresh. A sturdy zipper ensures secure closure. These materials make a practical and stylish lunch bag.
How Long Does It Take To Sew A Lunch Box Bag?
Sewing a lunch box bag typically takes 1 to 2 hours. The time depends on your sewing skills and bag complexity. Beginners may take longer, while experienced sewers finish faster. Planning and preparation can help speed up the process.
Can I Wash A Homemade Lunch Box Bag?
Yes, most homemade lunch box bags can be washed. Use gentle cycle with cold water to protect fabric and insulation. Air dry to maintain shape and durability. Check fabric care instructions for best results.
What Type Of Fabric Is Best For Lunch Box Bags?
Water-resistant or waterproof fabrics like nylon or laminated cotton work best. They protect against spills and keep food fresh. Insulated fabric adds thermal protection. Choose easy-to-clean fabrics for convenience.
Conclusion
Sewing your own lunch box bag saves money and adds a personal touch. You can choose colors and patterns you like best. The steps are simple and easy to follow. Practice makes sewing easier and more fun. Start with basic materials and tools you have at home.
Each bag you make will improve your skills a bit more. Enjoy carrying your handmade lunch bag every day. Keep trying, and soon sewing will feel natural. This small project brings joy and usefulness together.