
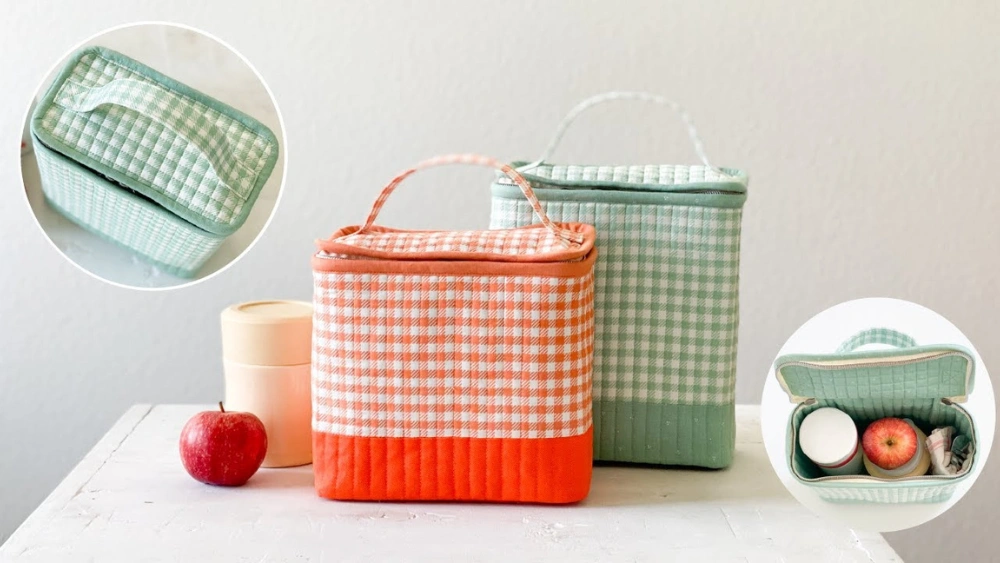
Are you tired of using flimsy plastic bags that tear or spill your lunch? Imagine having a sturdy, stylish lunch bag that keeps your food fresh and makes your day easier.
Making your own lunch bag is easier than you think, and it gives you full control over the size, design, and materials. In this guide, you’ll discover simple steps to create a lunch bag that fits your needs perfectly. Keep reading—you’re just minutes away from crafting a lunch bag that you’ll love to use every day.
Materials Needed
Making a lunch bag requires a few basic materials. These items help you create a durable and useful bag. Gather all the materials before starting your project.
This guide breaks down what you need into three parts. They are choosing the fabric, essential tools, and optional accessories. Each section explains what to use and why.
Choosing The Fabric
Selecting the right fabric is important. The fabric should be strong and easy to clean. Many people choose cotton, canvas, or nylon for lunch bags.
- Cotton: soft and easy to sew
- Canvas: thick and durable
- Nylon: water-resistant and light
- Insulated fabric: keeps food warm or cold
- Vinyl or oilcloth: easy to wipe clean
Essential Tools
You need some tools to make your lunch bag. These tools help you cut, sew, and finish the bag properly. Having them ready saves time and effort.
| Tool | Purpose |
| Scissors | Cut fabric cleanly and precisely |
| Measuring tape | Measure fabric and dimensions accurately |
| Needle and thread or sewing machine | Stitch fabric pieces together |
| Pins or clips | Hold fabric pieces in place |
| Iron | Press fabric and seams flat |
Optional Accessories
Optional accessories add function and style to your lunch bag. You may want to include these items to improve the bag’s use.
- Zipper or Velcro for easy closing
- Handles or straps for carrying
- Insulation lining to keep food fresh
- Decorative patches or embroidery for design
- Waterproof lining to prevent leaks

Credit: www.youtube.com
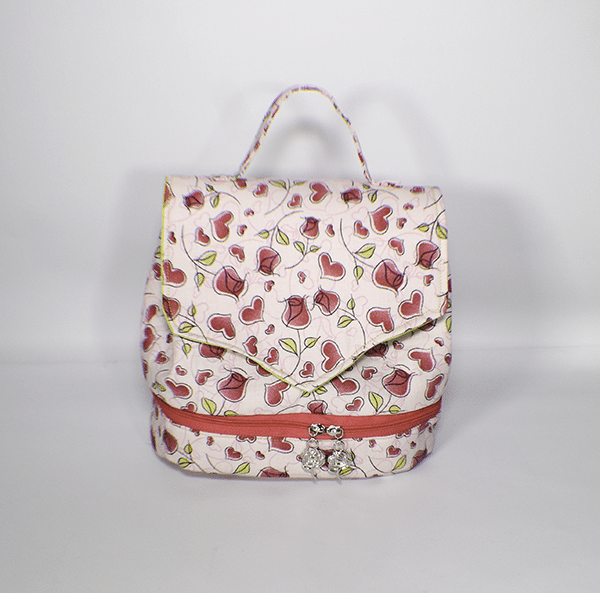
Design Ideas
Making a lunch bag is fun and useful. You can create a bag that fits your style and needs.
Try different designs to make your lunch bag unique and practical. This guide shows simple ways to start.
Simple Patterns
Use easy patterns to make your lunch bag look nice. Simple shapes like stripes or dots work well.
Choose patterns that you like and that match your bag’s size and shape. This helps the bag look clean and stylish.
- Stripes for a classic look
- Polka dots for a fun style
- Checks for a simple design
- Solid colors for a clean look
Adding Pockets
Pockets make your lunch bag more useful. You can keep utensils or napkins in them.
Add one or two pockets inside or outside. Choose sizes based on what you want to carry.
- Small pockets for spoons and forks
- Bigger pockets for snacks or fruit
- Zipper pockets for secure storage
- Mesh pockets for easy view
Personalizing Your Bag
Make your lunch bag special with your name or favorite designs. This helps you find it easily.
Use fabric paint, patches, or embroidery. Choose styles that show your personality.
- Write your name with fabric markers
- Sew on patches of your favorite things
- Add embroidered initials or shapes
- Use iron-on transfers for quick designs
Cutting The Fabric
Cutting the fabric is a key step in making a lunch bag. It needs to be done carefully for the bag to fit well and hold its shape.
Use sharp scissors and a flat surface to make straight cuts. This helps avoid waste and keeps the fabric neat.
Measuring Dimensions
Measure the fabric according to the size you want for your lunch bag. Include extra space for seams and folds.
| Part | Width (inches) | Height (inches) | Notes |
| Main Body | 12 | 10 | Include 1 inch seam allowance |
| Bottom Panel | 12 | 4 | Same width as body |
| Side Panels | 4 | 10 | Match height of body |
| Flap | 12 | 5 | Include 1 inch seam allowance |
Marking And Cutting Tips
Mark the fabric clearly before cutting. Use tailor’s chalk or a fabric marker that washes off easily.
- Lay fabric flat on a clean surface.
- Use a ruler or measuring tape to mark lines.
- Double-check measurements before cutting.
- Cut slowly along the marked lines.
- Keep scissors sharp for clean edges.
Credit: sewverycrafty.com
Sewing Steps
Making a lunch bag with sewing is a fun and simple project. You will learn how to stitch the bag parts together. This guide helps you sew the main body, lining, and handles.
Follow each step carefully to create a sturdy and useful lunch bag. Use your sewing machine or sew by hand if you prefer.
Stitching The Main Body
Start by cutting the fabric pieces for the main body. You usually need two large rectangles for the front and back. Also, cut two smaller pieces for the sides or bottom if your design includes them.
Place the right sides of the fabric together. Pin the edges to hold them in place. Sew along the pinned edges using a straight stitch. Leave the top open for the bag opening.
- Cut two large rectangles for front and back
- Cut side and bottom pieces if needed
- Pin right sides together
- Sew all edges except the top
Creating The Lining
Cut fabric pieces for the lining that match the main body size. The lining will give the bag a neat inside look and add strength.
Sew the lining pieces just like the main body. Keep the top edge open. Make sure you use a fabric that is easy to clean and durable.
- Cut lining pieces same size as main body
- Sew lining pieces with right sides together
- Leave top edge open
- Use easy-to-clean fabric
Attaching Handles Or Straps
Choose sturdy fabric or webbing for handles or straps. Cut two pieces for handles or longer pieces if you want shoulder straps.
Pin the handles to the top edges of the main body. Make sure they are evenly spaced. Sew the handles securely with a box stitch for strength.
- Cut handles or straps from strong fabric
- Pin handles evenly on top edges
- Sew handles with a box stitch
- Check that handles hold firmly
Adding Insulation
Adding insulation to your lunch bag helps keep food fresh and at the right temperature. It stops heat from escaping or entering the bag.
This guide shows how to add insulation to make your lunch bag better.
Choosing Insulating Materials
Choose materials that block heat well. Look for fabrics that are light and easy to sew.
Common insulating materials include foam, foil, and thermal fabrics. Each has different benefits.
- Foam sheets: soft and thick, block heat effectively
- Reflective foil: reflects heat away, keeps cool inside
- Thermal fabric: designed to keep temperature stable
- Fleece: adds warmth but less effective alone
Incorporating Insulation Layers
Add insulation between the outer fabric and the lining of the lunch bag. This keeps the insulating material safe and effective.
Use more than one layer for better results. Combine foam with foil for both padding and heat reflection.
- Cut insulation to fit bag size
- Sew or glue foam inside the outer fabric
- Place foil layer inside foam for reflection
- Add lining fabric on top to cover layers

Credit: www.youtube.com
Finishing Touches
Finishing touches make your lunch bag special. They ensure durability and style. These steps add functionality and charm.
Let’s explore adding closures, decorative elements, and a final quality check. These steps complete your project.
Adding Closures
Closures keep your lunch secure. They prevent spills and keep food fresh. Choose a method that suits your design.
Consider using snaps, zippers, or Velcro. Each has its benefits and adds convenience.
- Snaps are easy to use and install
- Zippers offer a tight seal
- Velcro is adjustable and simple
Decorative Elements
Decorative elements make your lunch bag unique. They add personality and style. Choose elements that reflect your taste.
Use fabric paint, patches, or embroidery. These decorations enhance the appearance and make the bag fun.
- Fabric paint allows for custom designs
- Patches add texture and interest
- Embroidery provides a classic touch
Final Quality Check
A final quality check ensures everything is perfect. Examine your lunch bag for durability and appearance.
Check seams, closures, and decorations. Ensure they are secure and aligned correctly.
- Inspect seams for even stitching
- Test closures for proper function
- Verify decorations are firmly attached
Care And Maintenance
Keeping your lunch bag clean ensures it lasts longer. Proper storage helps maintain its shape and function. Follow these simple tips for care and maintenance.
Cleaning Instructions
Clean your lunch bag regularly to avoid odors and stains. Use mild soap and warm water for the best results.
- Empty the bag and shake out crumbs.
- Use a damp cloth with mild soap to wipe the interior.
- Rinse with a clean, damp cloth.
- Air dry completely before using again.
Storage Tips
Proper storage keeps your lunch bag in good condition. Follow these tips to store it effectively.
Store in a cool, dry place. Avoid direct sunlight to prevent fading. Lay flat or hang by the handle to maintain shape.
Frequently Asked Questions
What Materials Are Best For Making A Lunch Bag?
The best materials for lunch bags are insulated fabrics like neoprene or polyester. These keep food fresh and maintain temperature. Durable, easy-to-clean materials also work well. Adding a waterproof lining helps protect against spills and leaks.
How Do I Sew A Simple Insulated Lunch Bag?
To sew an insulated lunch bag, cut fabric and insulation layers. Sew the layers together, leaving an opening for food. Add a zipper or Velcro closure for easy access. Finish edges with bias tape for durability and neatness.
Can I Customize My Lunch Bag Design?
Yes, you can customize lunch bags with fabric patterns, colors, and sizes. Add pockets or compartments for utensils and napkins. Personalize with embroidery, patches, or appliqué to make it unique and stylish.
How Do I Clean A Homemade Lunch Bag?
Clean your lunch bag by wiping the inside with mild soap and water. For fabric bags, hand wash or machine wash on gentle cycle if allowed. Always air dry completely before use to prevent mold and odors.
Conclusion
Making a lunch bag is simple and fun. It saves money and helps you eat healthy. You can choose your favorite fabric and style. Sewing your own bag lets you be creative. It also reduces waste from plastic bags. Try different sizes to fit your needs.
Small steps like this help the environment. Enjoy your homemade lunch bag every day. Give it a try and see the difference.


